Recently we had a client whose Openstack configuration required us to use a SOCKSv5 proxy to access the Horizon Dashboard. Rather than create the tunnel by running ssh -D 8080 -f -C -N ${remote-host}, it made more sense to setup the port forwarding in ~/.ssh/config and create a couple aliases that allowed us to quickly start/check/exit the tunnel.
Configure the Tunnel
Add the following to your ~/.ssh/config file:
Host my-proxy
  Hostname x.x.x.x
  User admin-user
  IdentityFile ~/.ssh/id_rsa
  DynamicForward 8080
  ControlMaster auto
  ControlPath ~/.ssh/sockets/%[email protected]%h:%p
Make sure you:
- Replace the filepath for the key pair used in
IdentityFileas needed. - Replace
x.x.x.xwith the desired IP address, most likely a jumphost. - Replace
admin-userwith the desired user. - Know what port you need to forward. Here we are forwarding
8080, but your needs may differ. - Create the
~/.ssh/socketsdirectory if it does not already exist.
Using Aliases to make our lives easier
Put the following in your ~/.bash_profile:
## For My Proxy Tunnel
alias proxy-on='ssh -fN my-proxy'
alias proxy-check='ssh -O check my-proxy'
alias proxy-off='ssh -O exit my-proxy'
Starting/stopping the proxy
$ proxy-on
{{no output}}
$ proxy-check
Master running (pid=24407)
$ proxy-off
Exit request sent.
$ proxy-check
Control socket connect(/Users/quinn/.ssh/sockets/[email protected]:22): No such file or directory
Configuring the Proxy in the web browser
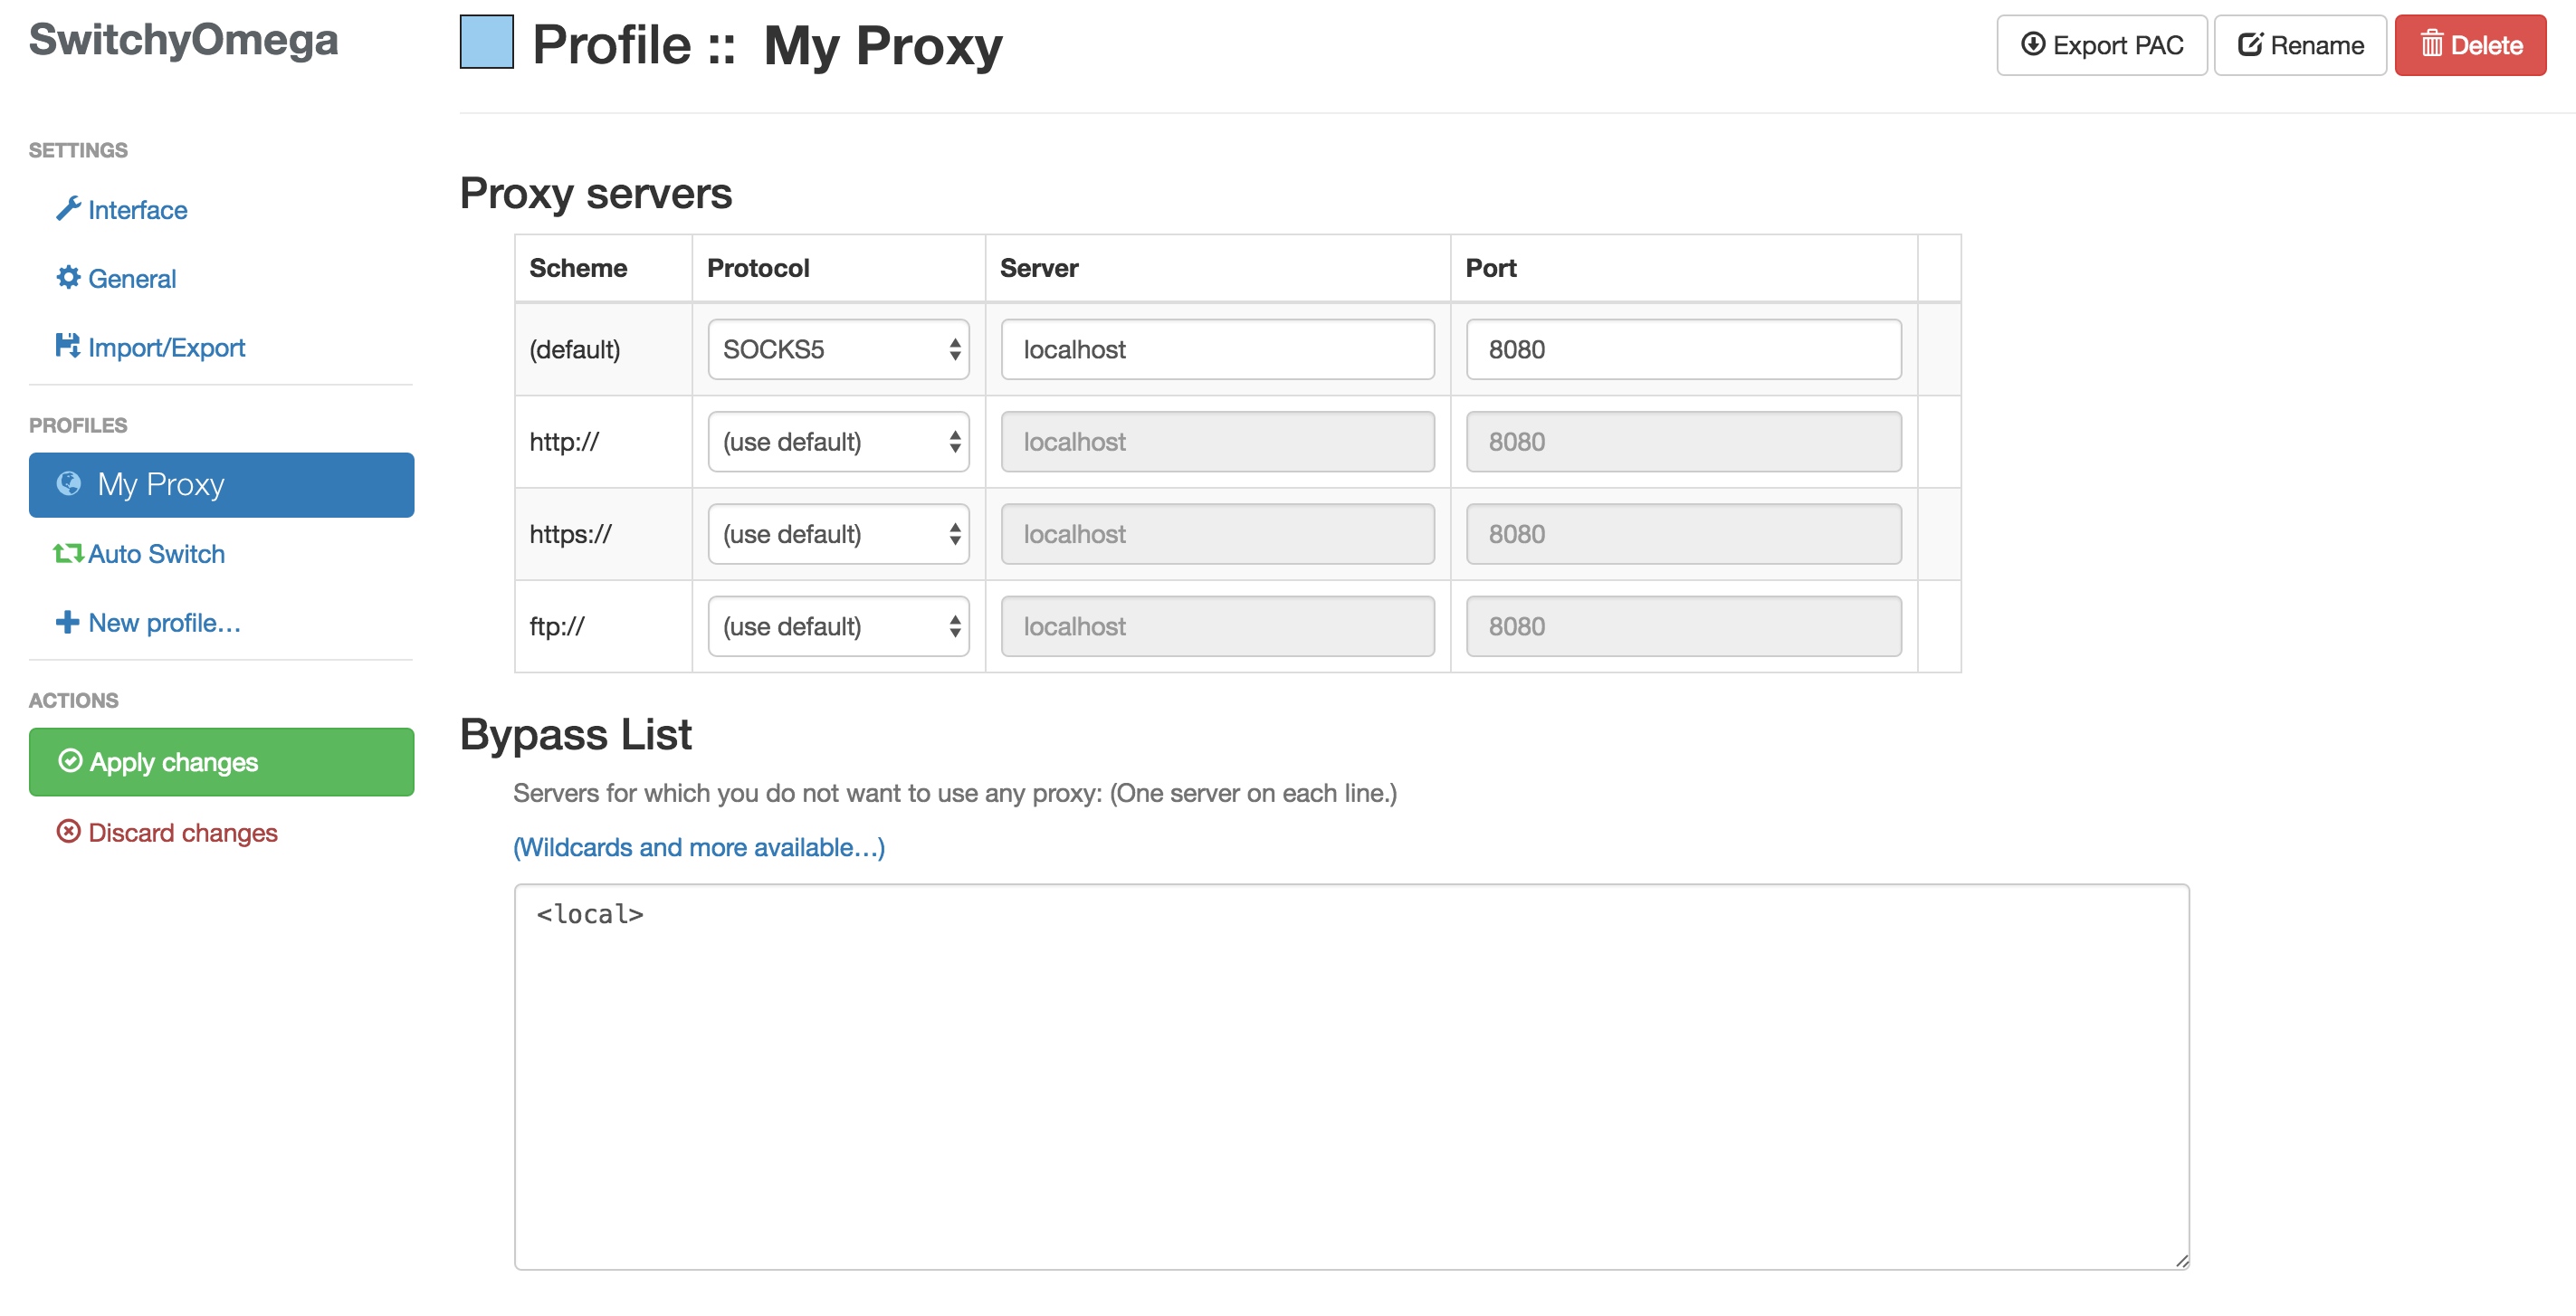
If you are using Chrome, you can use the SwitchyOmega browser extension (or its predecessor SwitchySharp) to setup the proxy. The proxy will need to be SOCKSv5, localhost, port 8080. If you are using the SwitchyOmega extension, it will look like the following:
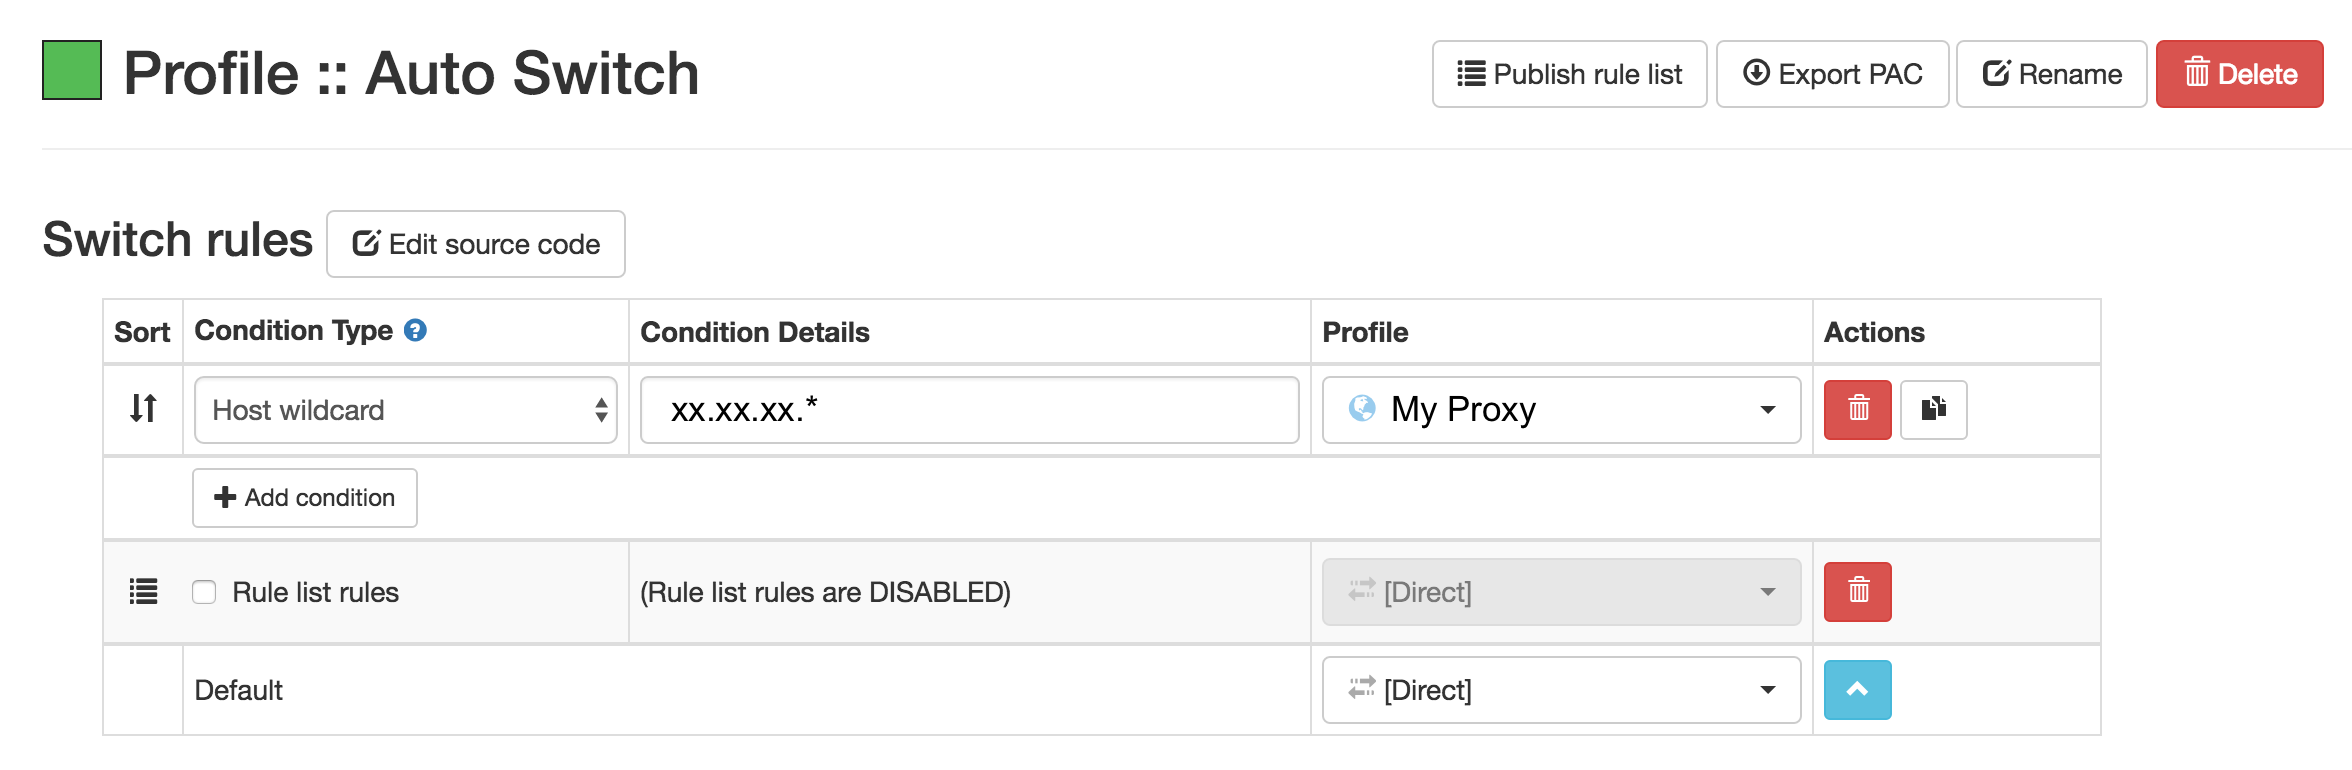
It’s also worth creating a Auto Switch rule so that you don’t have to manually toggle between the appropriate proxy setting:
Accessing the desired URL
Once you have the tunnel running (proxy-on) and the auto switch rule in place, all you need to do is go to the desired URL.
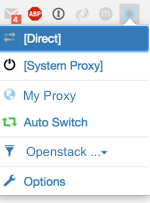
If you opted out of the auto-switch, you can toggle between the Direct and Proxy connections in the extension:
(For the curious, the visible browser extensions are Checker Plus for Gmail, Ad Block Plus, 1Password, JSONView, Momentum, and of course SwitchyOmega.)

Spread the word