At Stark & Wayne we’ve been building out a set of internal web apps to help collect and pass information to the staff who need it. For example, one app pulls data from a primary source (such as timesheet entries) and at the end of the day it shares the information into a private Slack channel, or provides a helpful reminder to a staff member to update their timesheet.
Time will tell if this system works well for us or not; but right now it is interesting to share how we use Pivotal Scheduler service to collect time sheet data and determine if/when Slack messages are to be sent.
The Pivotal Scheduler service is very efficient – it means we do not need to run full-time application containers to watch the clock and decide if they should perform behaviour. Instead, the Scheduler service starts new application containers on demand. On Pivotal Web Service, we only pay for the container whilst the half-hourly task is running. This can be a fantastic discount over running full-time application instances.
There is also flexibility with short-term one-off tasks – you can use any programming language or pre-built binary supported by any Cloud Foundry buildpack. You do not need to write a full web application; instead you’re only writing a finite script. Write it in bash if you like. Install interesting debian packages with the apt_buildpack (see our recent post). Scheduled tasks can be so much easier to write and run than long-running applications.
If you are using on-premise Pivotal Cloud Foundry then you can also use the Pivotal Scheduler service. I’ll introduce how to find and install the p-scheduler.pivotal tile later in the article.
This article will also discuss the complimentary cf CLI plugin which offers a range of helpful commands (cf create-job, cf schedule-job, cf run-job, and more).
The article will also cover the nuances of using the Scheduler service with zero-downtime deployed applications (why? the scheduler can lose track of your scheduled jobs when you perform a zero-downtime deploy)
Installing the Scheduler Service
There are two scenarios to cover: publicly hosted Pivotal Web Service, and on-premise Pivotal Cloud Foundry.
Ready to go in Pivotal Web Services
First, when you use Pivotal Web Services there is nothing special to do. Pivotal Scheduler service is already available to all customers as a free service.
$ cf marketplace -s scheduler-for-pcf
Getting service plan information for service scheduler-for-pcf...
OK
service plan   description         free or paid
standard       Scheduler for PCF   free
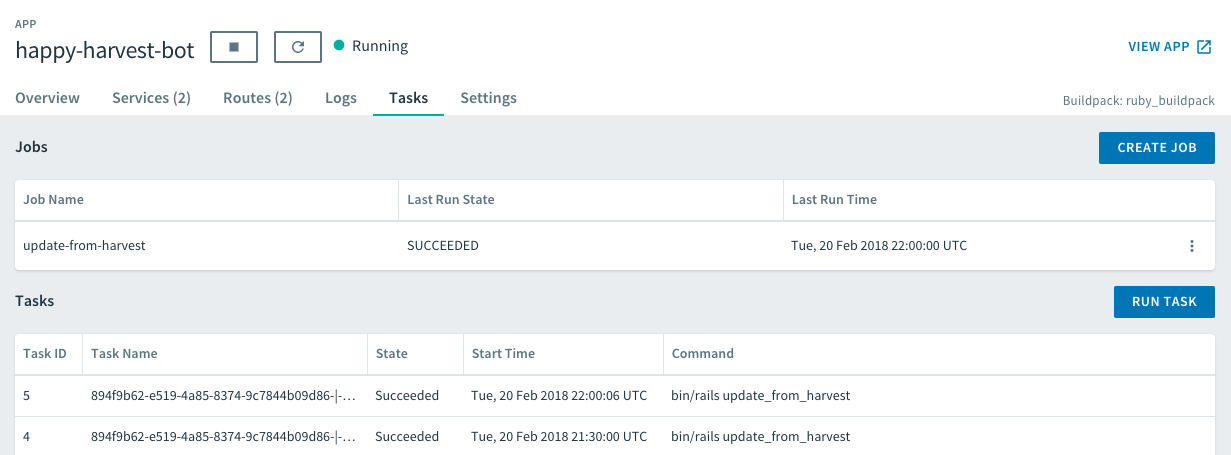
The Pivotal Web Services console provides special integration for the Scheduler service. When you navigate to an Application’s page, there is now a "Tasks" tab:
Following the prompts you can enable the service for your application. But in this article we will focus on using the cf CLI, which will then allow us to setup our scheduled tasks in CI after deployment.
Installing the tile into Pivotal Cloud Foundry
If you are running Pivotal Cloud Foundry (PCF) version 1.11 or higher (at the time of writing the supported versions are 1.11, 1.12, and 2.0), then you can install the Pivotal Scheduler tile.
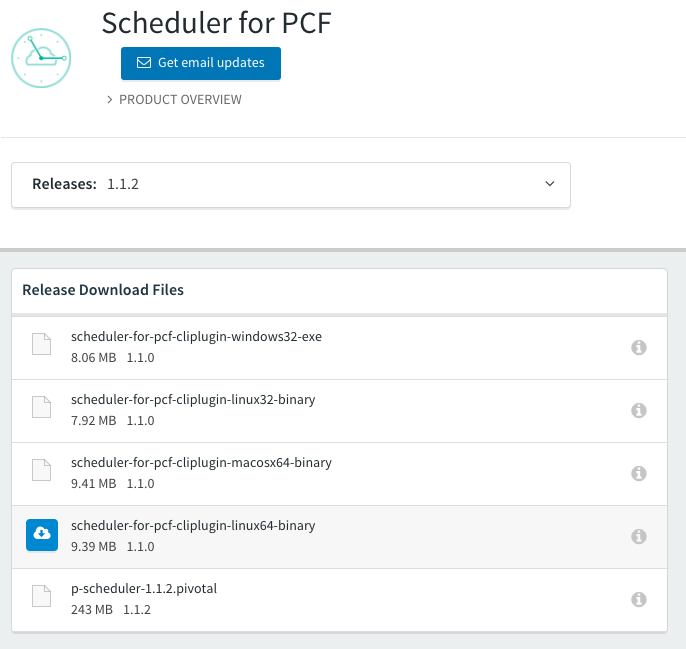
Visit Pivotal Network for the Scheduler for PCF tile, and download the .pivotal file.
Follow these instructions, including the installation of the dependency Pivotal MySQL tile.
Installing the CLI plugin
I’m a huge fan of Cloud Foundry services having their own cf plugin to expand the set of functionality to developers. The Pivotal Scheduler CLI plugin offers over a dozen new CLI commands.
Unlike nearly all CLI plugins, the Pivotal Scheduler cf plugin is not available at https://plugins.cloudfoundry.org/ nor the built in cf install-plugin command.
As far as I can tell, the CLI plugin is only available via Pivotal Network. This becomes a little bit annoying when we get to setting up the CLI plugin within CI. And it’s a little bit annoying for humans too; each new version will need to be manually downloaded and installed.
Each developer will need to download the plugin, and then install the plugin:
cf install-plugin path/to/scheduler-for-pcf-cliplugin-*
Getting Started
From now on, the instructions for using the Scheduler service is the same for hosted Pivotal Web Services and on-premise Pivotal Cloud Foundry.
To explore the Scheduler service, clone a demo repository that includes a simple hello-world.sh task script.
git clone https://github.com/starkandwayne/pcf-scheduler-demo
cd pcf-scheduler-demo
./hello-world.sh
Next, deploy our application to PWS/PCF. Note that there is no long-running web app.
cf create-space scheduler-demo
cf target -s scheduler-demo
cf push hello-world --health-check-type none -i 0 -m 64M -b binary_buildpack --no-route
The cf push command will sort-of succeed/sort-of complain.
...
start command:     >&2 echo Error: no start command specified during staging or launch && exit 1
There are no running instances of this app.
Cloud Foundry Application Runtime likes to run full-time application instances. We don’t need that. It’s complaint is our compliment.
Next, you will instantiate the Scheduler service for your application.
cf create-service scheduler-for-pcf standard hello-world-scheduler
cf bind-service hello-world hello-world-scheduler
Next, we use the new cf commands to create a scheduler "job" and to run it to test it works.
cf create-job hello-world say-hello "./hello-world.sh"
Explaining the parameters:
hello-worldis the name of the application to which we will assign a new jobsay-hellois the name of the job; we will use this label to run the job and to schedule the job to run automatically"./hello-world.sh"is the command to run, relative to the root of the application folder. This will be run within a fresh application container within Cloud Foundry.
To test our job, or to run it whenever we want:
cf run-job say-hello
The output might not be what you are expecting:
Enqueuing job say-hello for app hello-world...
OK
Where is our "Hello world!" output?
Our script prints to standard out/STDOUT. Within Cloud Foundry, anything printed to STDOUT/STDERR pipes is sent to the logging subsystem. To view the recent logs from our task:
cf logs hello-world --recent
The logs associated with our one-off task are:
   2018-02-21T08:51:31.68+1000 [CELL/0] OUT Creating container
   2018-02-21T08:51:32.24+1000 [CELL/0] OUT Successfully created container
   2018-02-21T08:51:33.02+1000 [APP/TASK/892d4e2c-a116-45b2-854e-5118c32e5b73-|-5bdce448-c1f3-4c3c-b585-9815a6b7caaa/0] OUT Hello world!
   2018-02-21T08:51:33.03+1000 [APP/TASK/892d4e2c-a116-45b2-854e-5118c32e5b73-|-5bdce448-c1f3-4c3c-b585-9815a6b7caaa/0] OUT Exit status 0
   2018-02-21T08:51:33.04+1000 [CELL/0] OUT Stopping instance 60fe1646-be1a-4979-a494-7d4086d479fe
   2018-02-21T08:51:33.04+1000 [CELL/0] OUT Destroying container
   2018-02-21T08:51:33.57+1000 [CELL/0] OUT Successfully destroyed container
Nested in the middle of line 3 is OUT Hello world!. This means that Hello world! was sent to STDOUT.
It worked!
We have a one-off task without requiring the costs and hassle of running a full-time web application. Serverless FTW!
Scheduling jobs
We can now schedule our job. Every minute. Every 5 minutes. Every hour. Once a day. Anything you like.
To schedule our say-hello task every 30 minutes:
cf schedule-job say-hello "*/30 * ? * *"
The "*/30 * ? * * " is crontab format.
Except this expression which works in Pivotal Scheduler is not what you’ll get from any crontab generator you might find on the Internet. I found this confusing and disorientating.
The ? question mark, rather than an * asterisk is important. I don’t know why. Perhaps these are bugs which might get fixed in future versions. Perhaps there are reasons for it. Cosmologically significant, end-of-times reasons. Without the ? you might get an error like I do.
Validation of resource failed.
  The cron expression '*/30 * * * *' is invalid.
You can argue with your computer all you like. Pivotal Scheduler wants a ? like "*/30 * ? * *".
Inspecting your jobs
There are additional CLI commands to inspect your jobs and their history:
$ cf jobs
Job Name    App Name      Command
say-hello   hello-world   ./hello-world.sh
OK
$ cf job-history say-hello
Getting scheduled job history for say-hello...
1 - 2 of 2 Total Results
Execution GUID     Execution State ...
d9ce17cd-7909...   SUCCEEDED ...
8b63c600-cfe1...   SUCCEEDED ...
And as discussed before, view your cf logs to see the output and error messages.
Using Pivotal Scheduler in CI
We use the cf zero-downtime-push command to perform zero downtime deploys (via the https://github.com/contraband/autopilot project, bundled in Concourse CI https://github.com/concourse/cf-resource).
Zero downtime deploys are delightful. They do break Pivotal Scheduler jobs. That’s less delightful.
The reason is due to the common implementation of zero downtime deploys (possibly fixed with cf v3-push) – there are two applications deployed. The human labels for application names suggest that after the deploy the application is the same application as before; but it is a new application. And the Pivotal Scheduler does not know this. So it loses track of the association of your jobs to the old application.
My current solution is to recreate the scheduled job after deployment.
That is, after running the cf zero-downtime-push, you then run the cf create-job and cf schedule-job commands again. Fixed.
You do lose your job history from before the deployment. I don’t have a solution to that. Perhaps moving to cf v3-push will be a solution in future.
Summary
It is a wonderful alternate use case of both Pivotal Web Services and Pivotal Cloud Foundry to run serverless-like scheduled tasks.
They can be ridiculously cheap to run (you pay only for the running time of the application instances).
And they can be ridiculously simple to write. Is there any long-running web application that is simpler to write than our example task above:
#!/bin/bash
echo "Hello world!"

Spread the word