Now that we have everything deployed, let’s explore and understand Argo and what it can do for you.
Understanding Applications:
An Argo Application is a Kubernetes Custom Resource Definition. It is used by Argo to provide a wrapper around a few other tools it is able to use. We’ll start with the common settings for all Application Types (Helm, Kustomize, JSonnet/kSonnet, Kube-Specs).
apiVersion: argoproj.io/v1alpha1kind: Application
metadata:
  name: quake-external-dns
  # You'll usually want to add your resources to the argocd namespace.
  namespace: quake-system
  # Add a this finalizer ONLY if you want these to cascade delete.
  finalizers:
    - resources-finalizer.argocd.argoproj.io
spec:
  syncPolicy:
    automated:
      # Specifies if resources should be pruned during auto-syncing ( false by default ).
      prune: true
      # Specifies if partial app sync should be executed when resources are changed only in target Kubernetes cluster and no git change detected ( false by default ).
      selfHeal: true
  # Ignore differences at the specified json pointers
  ignoreDifferences:
  - group: apps
    kind: Deployment
    jsonPointers:
    - /spec/replicas
  # DEPLOY ON SELF
  destination:
    server: https://kubernetes.default.svc
    namespace: quake-system
  # The project the application belongs to.
  project: default
The Metadata field contains the actual Application Name and the Namespace where the Application CRD Resource (not what it deploys) lives. The reason is that ArgoCD can deploy Applications on remote clusters as well via the spec.destination, just continue reading :).
It also contains a finalizer which tells Kubernetes Garbage Collection to clean up the Resources that got deployed by the Argo Application Controller via the App-CRD.
The bulk of settings, as with all Kubernetes Resources, is within the “spec” field. The SyncPolicy allows you to control how the App-CRD will handle deploying it’s resources.
To illustrate, I deactivated autosync and updated the “dex.name” field via the Parameters Tab in AppDetails (“dex-server” -> “dex-server-argo”) value for ArgoCDs Dex:
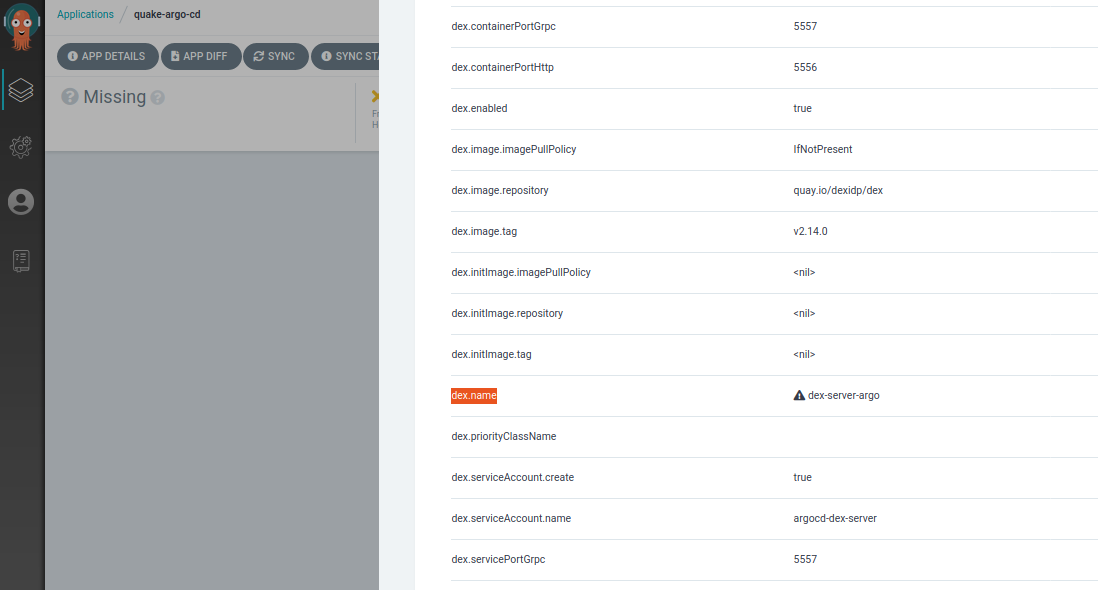
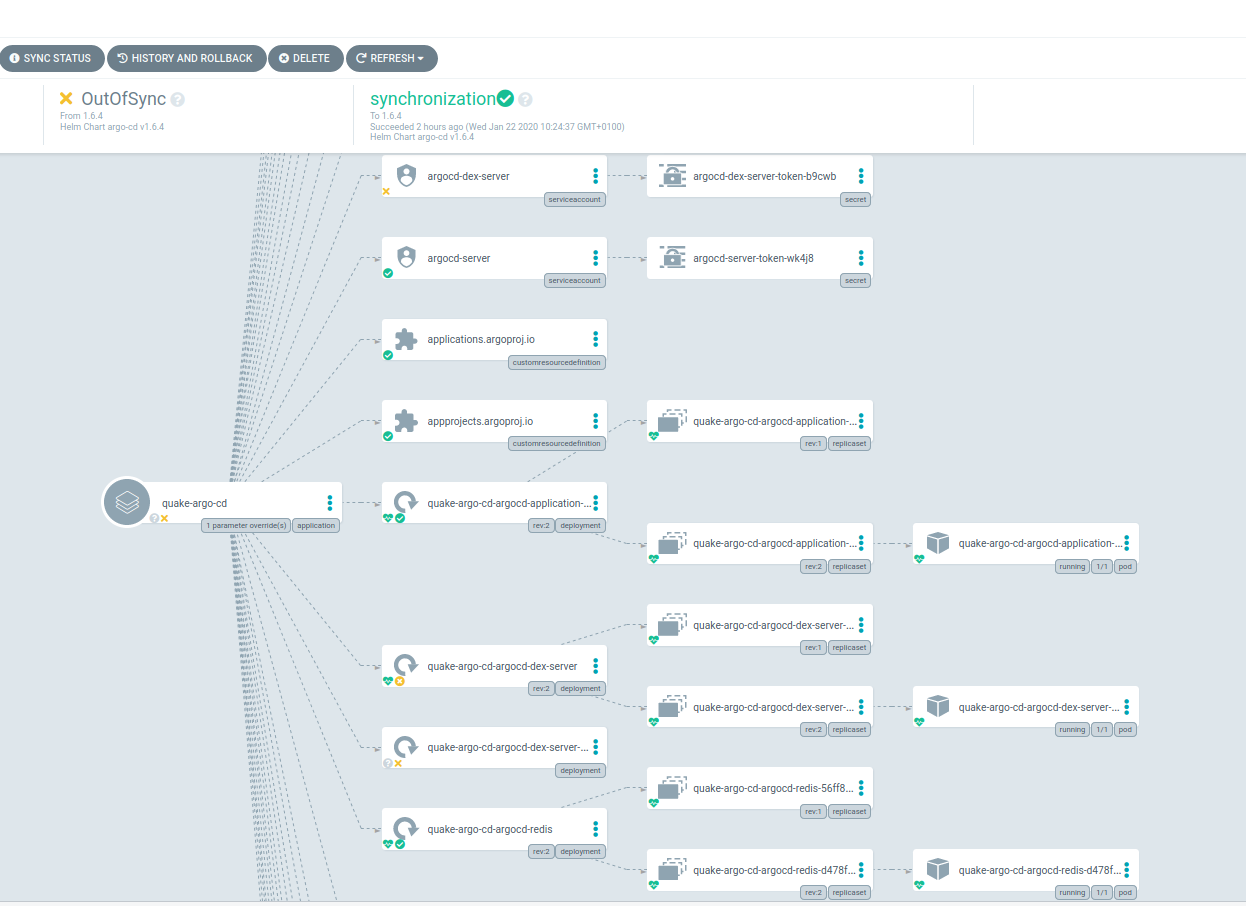
The Application is now marked “OutOfSync” and the UI shows us exactly which resources are affected. If we click on the “Sync”-Button the UI will open the Sync Sidebar to let us choose exactly what should be done. This is very useful if you’re still finding the right Config or want to know where your changes would propagate.
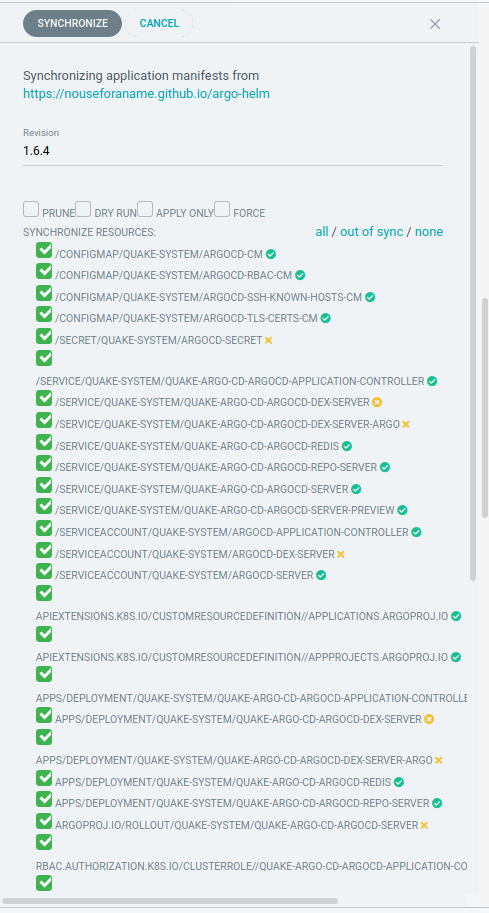
ArgoCD will also tell you whether the change can be done “in-place” or whether the resource needs to be “pruned” (deleted) first.
Sometimes Kubernetes Resources will get extra fields set after you run “kubectl apply.” This could potentially confuse ArgoCD and put you in a sync loop. Prime examples would be active “Mutating Webhooks” within your Kube-Cluster or an Autoscaling Solution. To avoid this, ArgoCD lets you specify the “ignoreDifferences” block. Our example contains a jsonPointer to “spec.replicas” to avoid resetting the amount of replicas in case they were changed manually or via some other mechanism within Kubernetes.
Some distributed deployments need to be done in sequence (if they cannot deal with eventual consistency). ArgoCD has you covered. If your stack/app requires a particular sequence to get up and running, use Waves. By annotating your resources, you tell ArgoCD how it should do things. A sync is done in three phases, each phase has five waves.
When Argo CD starts a sync, it orders the resources in the following precedence:
The phase
The wave they are in (lower values first)
By kind (e.g. namespaces first)
By name
Next we see the mentioned destination field. You can register Remote Clusters (meaning not the one where ArgoCD itself is running) with ArgoCD. You can do so by providing a labeled Secret into the ArgoCD Namespace (quake-system in our example).
As indicated by the “project” field, ArgoCD does allow for RBAC and Isolation. Projects also let you define “Sync-Windows” to limit when execution can happen. Maybe you’re a night-owl and want your syncs to happen at night, or you do not trust unattended auto-updates. In any case, I don’t judge and neither does Argo.
There is much more to explore, but only so many things I can fit in a reasonably long blog-post. ArgoCD Docs provide separate sections for different perspectives: Argo-Ops, Argo-User.
Understanding Workflows:
Workflows is what powers the CI Part in Argo. ArgoCD handles continuous deployments, and workflows complements it. It comes with its own UI, your can access it by port-forwarding to the service
“kubectl -n quake-system port-forward svc/quake-argo-ui 8080:80”
So, what can we do with Workflows? Well, pretty much everything you want. Workflows are somewhat like Init-Containers: they start, they do something, they die. But unlike Init-Containers, they are not scoped to run when one specific Pod starts. They also have functionality to “pass” along build artifacts or parameters, they can run in sequence, parallel, or branch out and do both.
So maybe you want to actually build your Software and package it in a Docker-Image for your Deployment just in time before deploying? Have some tests you want to run against a system you just deployed? Alert on success or failure of something? Create a backup? Initialize your Deployment with Data?
Let’s try adding some config to ArgoCD via a Workflow and learn some more about it along the way. Currently, our Application.yml’s are stored locally in:
“${REPO_ROOT}/state/argo/${QUAKE_CLUSTER_NAME}.${QUAKE_TLD}”
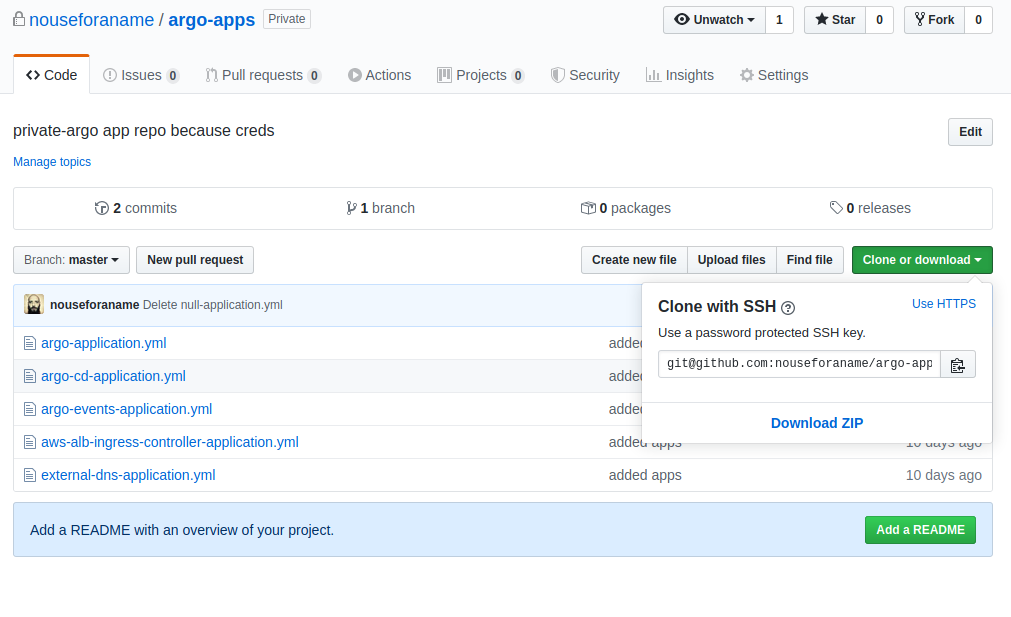
That is a bit unfortunate as we are the only ones able to access them. But they contain secrets, so just putting them in a publicly accessible Git-Repo is a bad idea. Create a private Repo and push the contents of the above directory, here is a screenshot of mine:
Our QUAKE terraform already prepared SSH Deploy keys for us:
cd ${REPO_ROOT}/terraform/
terraform output | grep GIT
QUAKE_CLUSTER_GITOPS_SSH_KEY = -----BEGIN RSA PRIVATE KEY-----
QUAKE_CLUSTER_GITOPS_SSH_PUB = ssh-rsa AAAAB3NzaC1yc2EAAAADAQABAAABAQC1vMubU/mZTpNI2BYbC+jG6I1eLerwtPSIZ00E0KokzfLOOjqmxqVwg2qVFhRQ4beAj4Mpg1/F7FO4rOZs0weStWt0xxHPqN81MiPKF0CZZYWG3lnLOsw+ivfJ45wrZutVCE71bVfonqrITKVYY6S2y7K5ic8JIOFMc1JGLweiKPoEfHH74VoG3x9ffIo+CXr06wZTzWePU39PdRzfi42xXyw9e3A2L7bQ9/2VpFylkUvNbiSxAKfU+RiBtZZsBhG/aV5a1GtTo2wnaYfZ3ty/GEwitR9IpfwsUNr1l/2aaRHaCVqACoXGThhhtwPlBL3Rnvl9Ivf1vOIhM6r1r7+l
We need to add the Public-Key as a Deploy-Key to our Git-Repo:
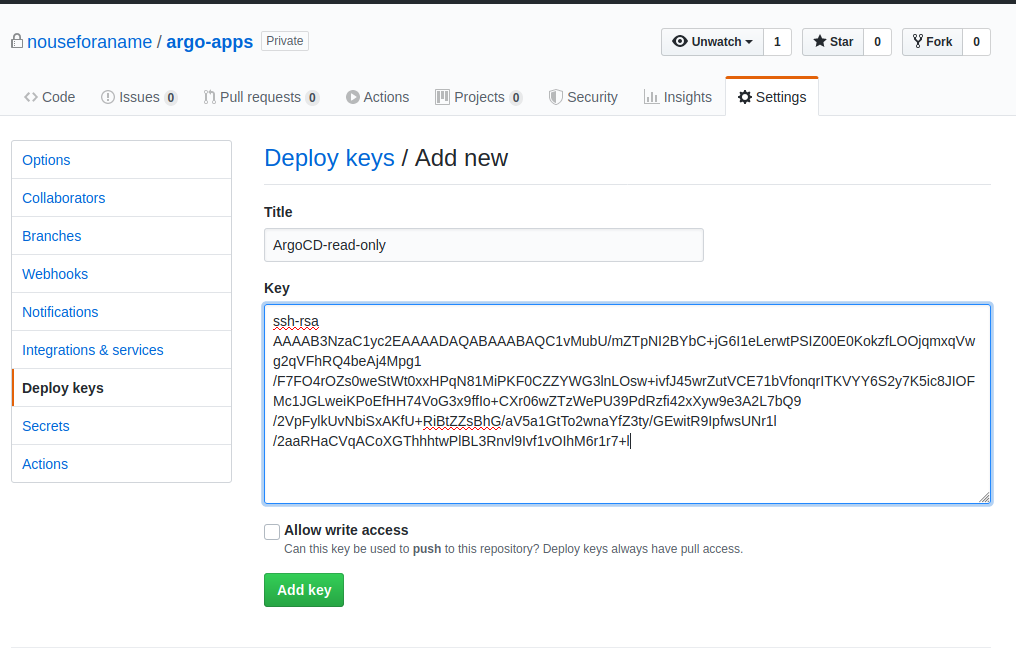
Once your Repo is configured we can use:
quake -w -u “[email protected]:username/reponame.git”
To create the workflow.yml, the quake-CLI will let you know where it was saved. Now, just apply the workload:
kubectl -n quake-system apply -f ${REPO_ROOT}/workflow/my-argo-workflow.yml
You can now see two things happen. First the Argo Workflow UI should look like this:
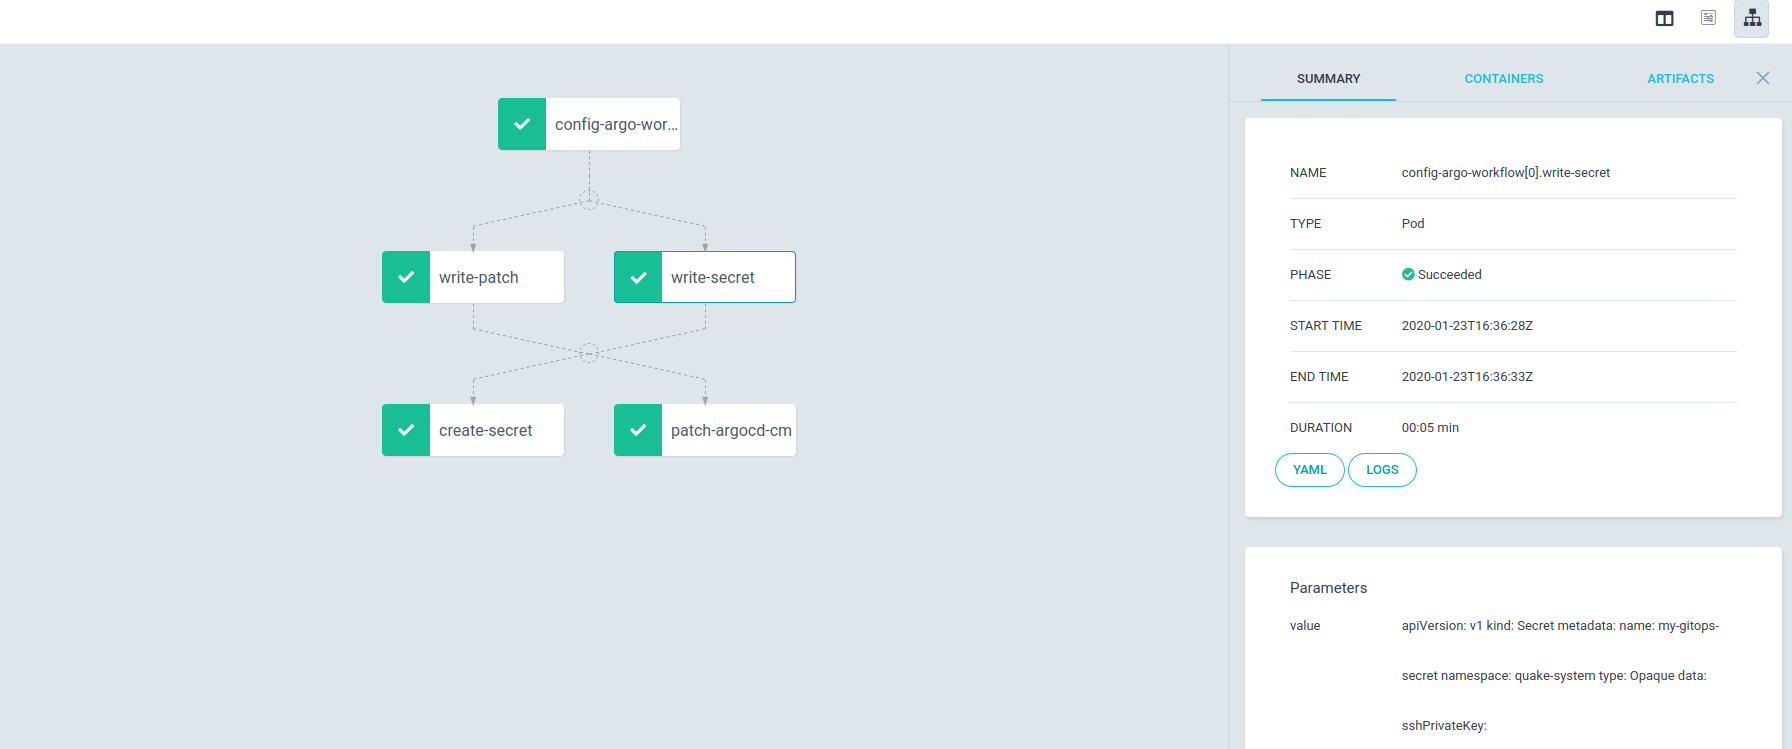
And second, once the workflow executed, you will have registered a private Git-Repo with ArgoCD:

Workflow Spec:
apiVersion: argoproj.io/v1alpha1
kind: Workflow
metadata:
  name: config-argo-workflow
  generateName: config-argo-steps-
spec:
  serviceAccountName: argo
  entrypoint: configure
  templates:
  - name: configure
    # Instead of just running a container
    # This template has a sequence of steps
    steps:
    # BLOCK A RUN IN PARALLEL
    - - name: write-secret           # double dash => run after previous step
        template: write-file
        arguments:
          parameters:
          - name: type
            value: secret
          - name: value
            value: |
              apiVersion: v1
              kind: Secret
              metadata:
                name: my-gitops-secret
                namespace: quake-system
              type: Opaque
              data:
                sshPrivateKey: SED_PLACE_HOLDER_PRIVATE_KEY_BASE64
      - name: write-patch           # single dash => run in parallel with previous step
        template: write-file
        arguments:
          parameters:
          - name: type
            value: patch
          - name: value
            value: |
              data:
                repositories: |
                  - url: SED_PLACE_HOLDER_REPO_GIT_URL
                    name: argo-apps
                    type: git
                    sshPrivateKeySecret:
                      name: my-gitops-secret
                      key: sshPrivateKey
    # BLOCK A RUN IN PARALLEL END
    # BLOCK B RUN IN PARALLEL
    - - name: create-secret
        template: kubectl-commands
        arguments:
          parameters:
          - name: action
            value: apply
          artifacts:
          - name: my-files
            from: "{{steps.write-secret.outputs.artifacts.my-file-output}}"
      - name: patch-argocd-cm
        template: kubectl-commands
        arguments:
          parameters:
          - name: action
            value: patch
          artifacts:
          - name: my-files
            from: "{{steps.write-patch.outputs.artifacts.my-file-output}}"
    # BLOCK B RUN IN PARALLEL END
    # BLOCK C TEMPLATES FOR ABOVE STEPS
  - name: kubectl-commands
    inputs:
      parameters:
      - name: action
      artifacts:
      - name: my-files
        path: /input.yml
    container:
      image: bitnami/kubectl:latest
      command: [bash, -c]
      args:
      - |
          if [[ "{{inputs.parameters.action}}" == "apply" ]]; then
            kubectl -n quake-system apply -f /input.yml
          elif [[ "{{inputs.parameters.action}}" == "patch" ]]; then
            kubectl -n quake-system patch cm/argocd-cm --patch "$(cat input.yml)"
          fi
  - name: write-file
    inputs:
      parameters:
      - name: value
      - name: type
    outputs:
      artifacts:
      - name: my-file-output
        path: /tmp/output.yml
    container:
      image: alpine:latest
      command: [sh, -c]
      args:
      - |
          if [ "{{inputs.parameters.type}}" == "secret" ]; then
            echo "creating secret"
          elif  [ "{{inputs.parameters.type}}" == "patch" ]; then
            echo "creating patch"
          fi
          echo "{{inputs.parameters.value}}" | tee /tmp/output.yml
    # BLOCK C TEMPLATES FOR ABOVE STEPS END
The above workflow is a very basic example and should give you a good idea about their structure. Workflows can do more than that though. You can implement conditionals, loops, and even recursion.
But, why have we done this? Yes, we could’ve just configured our Repo and created the Secret via the Helm-Chart of ArgoCD. But that wouldn’t give you an example of a real life workflow, would it?
Having ArgoCD hooked up to a private repository gives you a few advantages. You can now create an App of Apps and keep Application.yml’s safely and versioned in a Git Repo. Instead of running commands, we just commit and push to our Repo and ArgoCD picks up the changes for us and we can easily roll bock to a previous state by either changing the commit reference in the App of Apps or reverting the commit in Git. Try re-configuring your ArgoCD App for ArgoCD :).
Usually, there are a few ways to achieve a result: Your Platform, your choice. If you’re interested in learning about Events and Rollouts, the second Recap for Argo is soon to be released.
Next week we will continue with deploying KubeCF on top of our current Platform to learn about what Cloud Foundry can do for you.

Spread the word