Welcome!
This manual will guide you through the steps necessary to deploy Cloud Foundry using Terraform on Amazon Web Services. A tremendous amount of automation has been put in place to allow you to quickly deploy Cloud Foundry in an easy and repeatable way.
If you know your AWS access key credentials, skip straight to "Install Terraform"
Overview
There are four primary steps to deploying Cloud Foundry (and one to destroy), we will explore each step in the subsequent sections:
- Prerequisites
- Configure Install
- Connect to Cloud Foundry
- Deploy Services
- Destroy the Deployment
Exercise 1 – Prerequisites
AWS Configuration
We’ll assume that you have an AWS account which has never been used before and you can log into. We will:
- Get your keys:
AWS_ACCESS_KEYandAWS_SECRET_KEY - Create a SSH Key
Get Your AWS Keys
If you already know your AWS credentials (access_key_id and secret_access_key, which are not the same as your AWS login and password) you can skip this step.
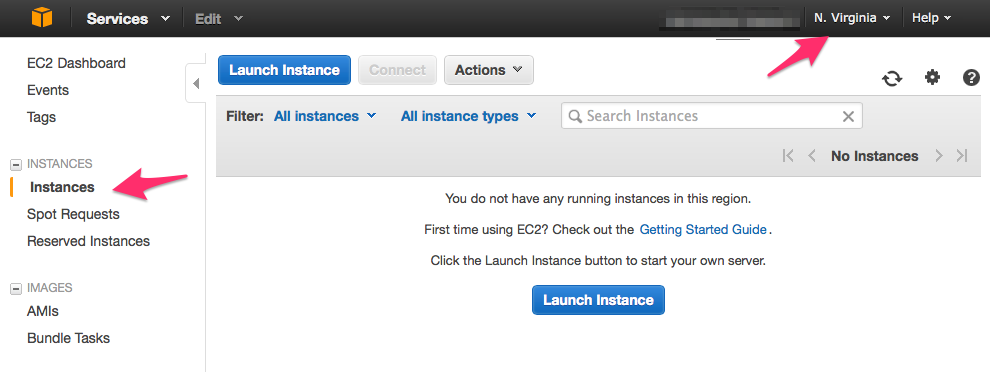
Start by logging into AWS: https://console.aws.amazon.com
Click on “Instances” in the left pane, make sure to select Oregon as your region
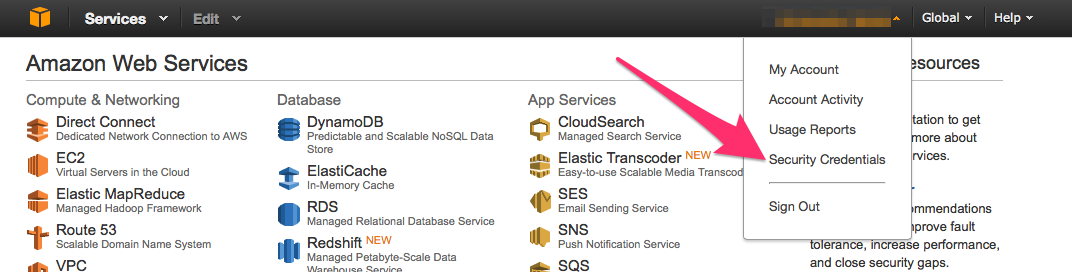
Select the dropdown next to your login name and select “Security Credentials”
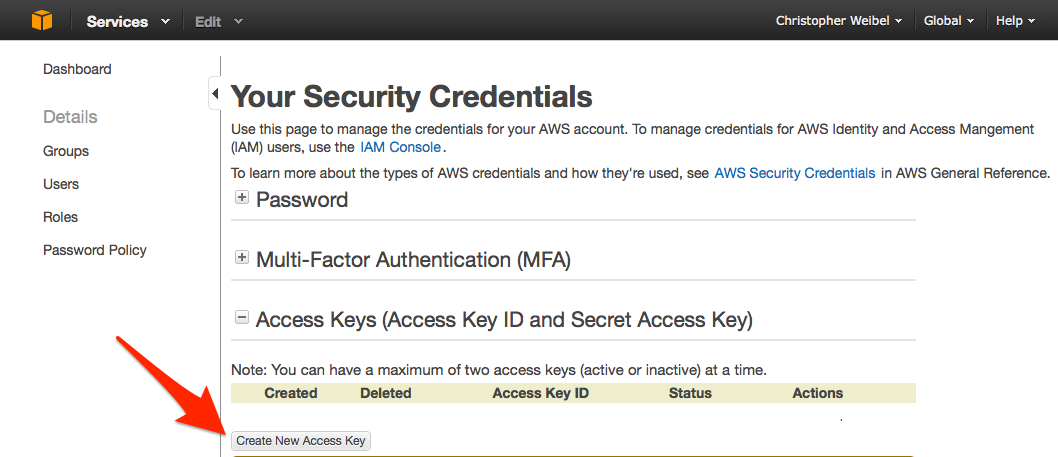
Then select “Create New Access Key”. If there are already keys created you may want to stop and consult someone in your organization to obtain the access_key_id and secret_access_key as there is a limit of 2 sets of Access Keys which can exist.
You will be prompted to download the security file as a csv. DO THIS! You cannot retrieve the aws secret key once the screen is closed.
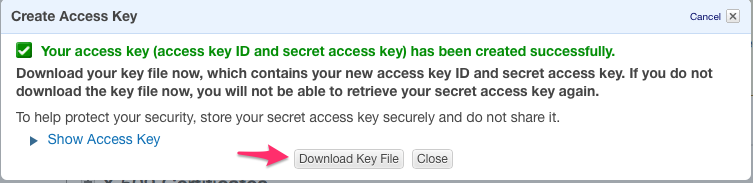
Document the access_key_id and secret_access_key somewhere privately and securely within your organization and keep these safe, these are the only two pieces of information needed to consume AWS resources by fraudsters.
For the this example deployment we’ll assume the following keys:
AWSAccessKeyId=AKIAJ354GOFUDGEYRMTT
AWSSecretKey=c9/flkkasITUmdlQdzbnIu4ff+UgIOQuB/xb
Create a SSH Key
If you already have a Key Pair created you can skip creating a new key pair.
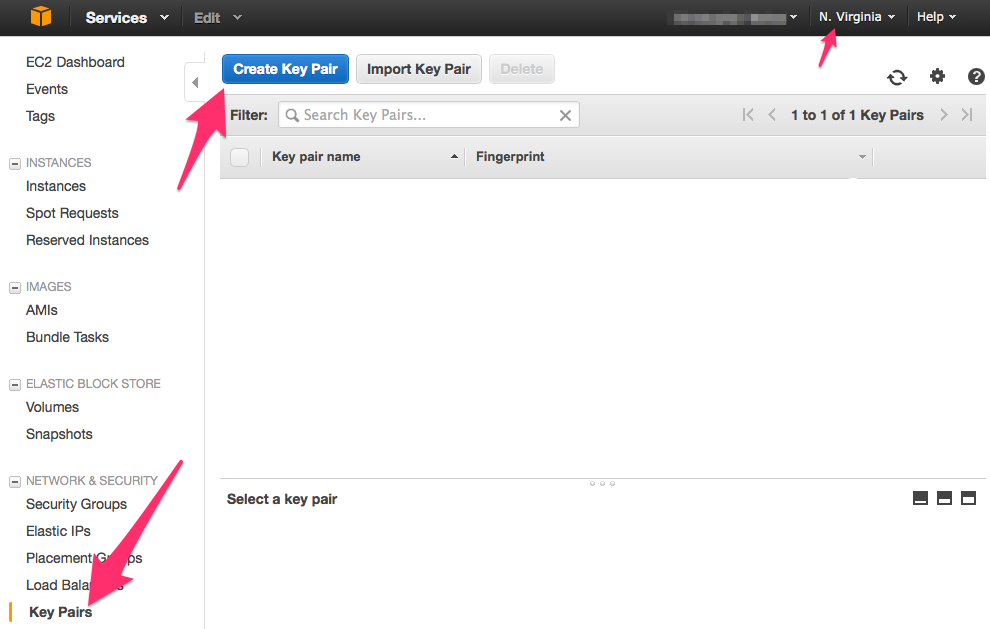
Making sure that “Oregon” is selected as the AWS Region, click “Key Pairs” then “Create Key Pair”
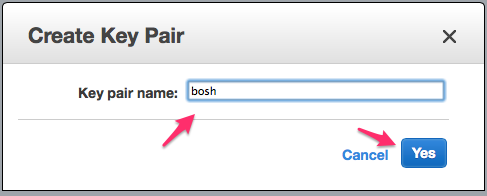
Name your key pair name “bosh” and click “Yes”
After you click “Yes” a file will be downloaded to your computer and likely named “bosh.pem.txt”
Rename this file to “bosh.pem” and save it into your ~/.ssh folder on your computer. For example, on OSX you can do this from the terminal:
mkdir -p ~/.ssh
mv ~/Downloads/bosh.pem.txt ~/.ssh/bosh.pem
Change the permissions for the bosh.pem file. For example, on OSX you can do this from the terminal:
chmod 400 ~/.ssh/bosh.pem
Local Configuration
We’ll assume that you have an OSX or Linux computer you are working from locally. There are a couple pieces of software which you will need installed:
- git
- Terraform 0.4.0+
Install git
You likely already have git installed if you do any development locally. Follow the instructions here to install git if you do not already have it installed: http://git-scm.com/book/en/v2/Getting-Started-Installing-Git a short summary is:
- OSX – “brew install git”
- RHEL/CentOS/Fedora – “sudo yum install -y git”
- Ubuntu/Debian = “sudo apt-get install -y git”
Install Terraform
Visit the following website to download a version of terraform for you local computer: https://www.terraform.io/downloads.html
After you download the appropriate zip, copy the files to a folder in your PATH, in the example below we use ~/bin
mv ~/Downloads/terraform_0/* ~/bin
Open a new terminal window and run:
terraform -v
You should get the following output:
Terraform v0.4.0
Exercise 2 – Configure Install
Now that we have our AWS keys we can supply these values to Terraform to deploy Cloud Foundry.
Clone the Repo
On your local computer run the following:
git clone https://github.com/cloudfoundry-community/terraform-aws-cf-install
cd terraform-aws-cf-install
cp terraform.tfvars.example terraform.tfvars
Back in Step 1 we obtained AWS Keys:
AWSAccessKeyId=AKIAJ354GOFUDGEYRMTT
AWSSecretKey=c9/flkkasITUmdlQdzbnIu4ff+UgIOQuB/xb
We also created a pem file in Step 1
~/.ssh/bosh.pem
Edit Variable File
Using the AWS Access and Secret Keys as well as the location of the ssh key we now have all the information needed for Terrafrom to deploy Cloud Foundry. We need to supply this information to Terraform by editing the terrafrom.tfvars file.
Using your favorite text editor (in the examples we will use vi) edit the terraform.tfvars file and supply the AWS keys and the location of you ssh key:
vi terraform.tfvars
After editing your file should look like:
aws_access_key = "AKIAJ354GOFUDGEYRMTT"
aws_secret_key = "c9/flkkasITUmdlQdzbnIu4ff+UgIOQuB/xb"
aws_key_path = "~/.ssh/bosh.pem"
aws_key_name = "bosh"
aws_region = "us-west-2"
network = "10.10"
cf1_az = "us-west-2a"
cf2_az = "us-west-2e"
Now you are ready to deploy, run:
make plan
make apply
Go get something to drink. It will take about an hour to deploy everything to AWS. Don’t panic if an error occurs during “make apply”, run the command again as AWS resources aren’t always available when requested.
When the installation has completed, your screen should output a series of values you will need to connect to the Cloud Foundry deployment, in our example we see:
aws_instance.bastion (remote-exec): Deployed 'cf-aws-tiny.yml' to 'bosh-vpc-885f0bed'
aws_instance.bastion: Creation complete
Apply complete! Resources: 9 added, 2 changed, 0 destroyed.
The state of your infrastructure has been saved to the path
below. This state is required to modify and destroy your
infrastructure, so keep it safe. To inspect the complete state
use the 'terraform show' command.
State path: terraform.tfstate
Outputs:
  aws_internet_gateway_id              = igw-23b12546
  aws_key_path                         = ~/.ssh/bosh.pem
  aws_route_table_private_id           = rtb-5d8cad38
  aws_route_table_public_id            = rtb-558cad30
  aws_subnet_bastion                   = subnet-17a6204e
  aws_subnet_bastion_availability_zone = us-west-1a
  aws_vpc_id                           = vpc-885f0bed
  bastion_ip                           = 54.175.138.250
  cf_admin_pass                        = c1oudc0wc1oudc0w
  cf_api                               = api.run.52.0.125.51.xip.io
  cf_domain                            = XIP
The three fields which we will need to connect to Cloud Foundry and the Bastion server have been noted above.
Exercise 3 – Connect to Cloud Foundry
In order to connect to Cloud Foundry, you will need to do the following locally (note that you can just use the Bastion server which will have these tools already installed):
- Install the CF CLI Tool
- Use the CF CLI Tool to connect to Cloud Foundry
Install CF CLI – Local
There are two ways to push CF apps: from your laptop or the bastion server. If will only be using the bastion server you can skip this step as it is already installed on the bastion server. If you would like to push CF apps from your laptop there are two methods of installation:
Method 1 – Use Traveling CF
Open a terminal window on your laptop and run:
curl -s https://raw.githubusercontent.com/cloudfoundry-community/traveling-cf-admin/master/scripts/installer | bash
Method 2 – Install Directly from Cloud Foundry
You will need to install the CF CLI tool, follow the instructions here: http://docs.cloudfoundry.org/devguide/installcf/install-go-cli.html
If you are running OSX, download version here and perform the install: https://cli.run.pivotal.io/stable?release=macosx64&version=6.10.0&source=github-rel
Install CF CLI – Bastion Server
The CF CLI and other tools are already installed on the bastion server.
Connect
Now that the CF CLI tool has been installed, connect to Cloud Foundry using the 2 noted values outputted from Step 2:
cf login --skip-ssl-validation -a api.run.52.0.125.51.xip.io -u admin -p c1oudc0wc1oudc0w
Thats it! You can now write your application locally and then push it to Cloud Foundry.
Exercise 4 – Deploy Services
Now that we have Cloud Foundry deployed to AWS let’s deploy some services which the Cloud Foundry applications can consume, such as PostgreSQL and Redis.
Modify terraform.tfvars
Add the following line to the terraform.tfvars file:
install_docker_services = "true"
Now you are ready to deploy, run:
make plan
make apply
After 20 or so minutes the Docker Services VM will be deployed. Even after the VM and jobs are running it will take about 10 minutes for all of the docker images to be imported and available for the Service Broker.
Register Services with Service Broker
In Exercise 3 you installed the CF CLI tools which we will use now to create a service broker. It may take up to 20 minutes for all of the unicorn web server to fetch all of the docker images. Execute the following on the bastion server:
cf create-service-broker docker containers containers http://cf-containers-broker.run.52.0.125.51.xip.io
Note 1
If you get an error indicating “cf” is not installed, run the following:
curl -s https://raw.githubusercontent.com/cloudfoundry-community/traveling-cf-admin/master/scripts/installer | bash
Note 2
If you forgot to login in Exercise 3 you will get the message ”No API endpoint set. Use ‘cf login’ or ‘cf api’ to target an endpoint.” If so, execute the following:
cf login --skip-ssl-validation -a api.run.52.0.125.51.xip.io -u admin -p c1oudc0wc1oudc0w
Once the service broker is created you can list the services available:
cf service-access
cf enable-service-access mysql56  # Enables a mysql 5.6 instance
Exercise 5 – Tear Down
Terraform does not yet quite cleanup after itself. You can run make destroy to get quite a few of the resources you created, but you will probably have to manually track down some of the bits and manually remove them. Once you have done so, run make clean to remove the local cache and status files, allowing you to run everything again without errors. Locally run:
make destroy
make clean
Now log back into AWS Console and delete any of the following which may have been left behind:
- Instances
- VPC
- Volumes
- Elastic IPs
- Key Pairs **
** If you would like to deploy CF again, leave the Key Pair named “bosh”
The following screen shots assume that you had a fresh/unused AWS environment as we will be removing all resources that will incur costs to AWS.
Instances
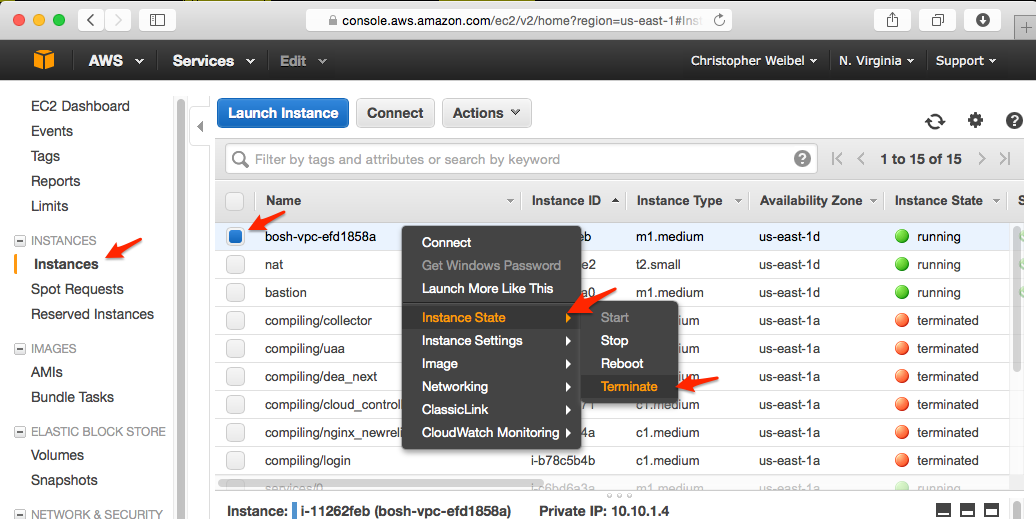
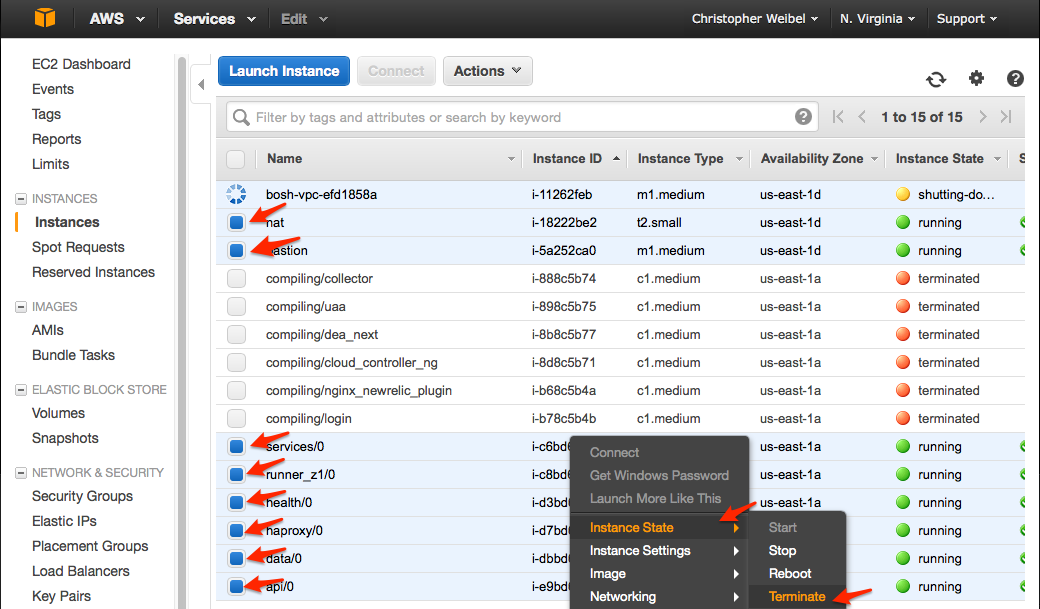
We will start with Instances first, begin by selecting “Instances” and finding the instance named “bosh-vpc-” and check the box, right click and select “Instance State” > “Terminate”. It is important to kill the bosh server first so other Cloud Foundry servers aren’t created while you are tearing down the rest of the servers.
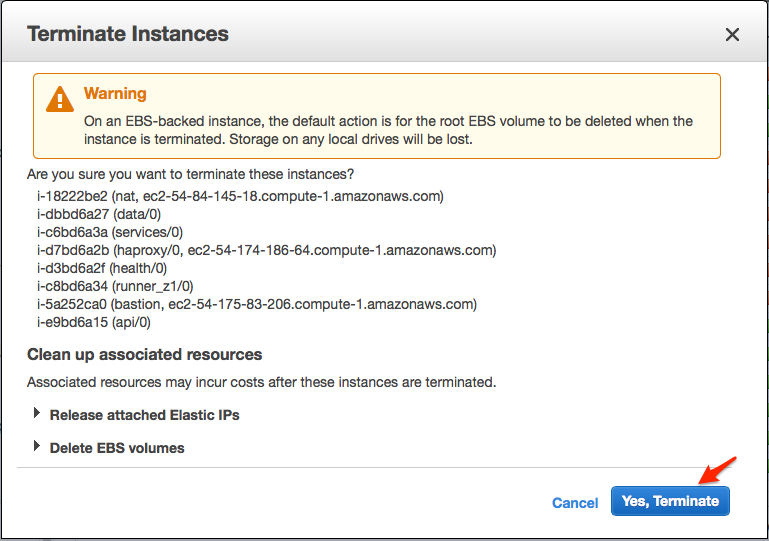
On the Terminate Instances screen, click “Yes, Terminate”
Now that the Bosh server has been terminated, select the rest of the servers by checking the box to the left of the instance Name, right click and select “Instance State” > “Terminate”.
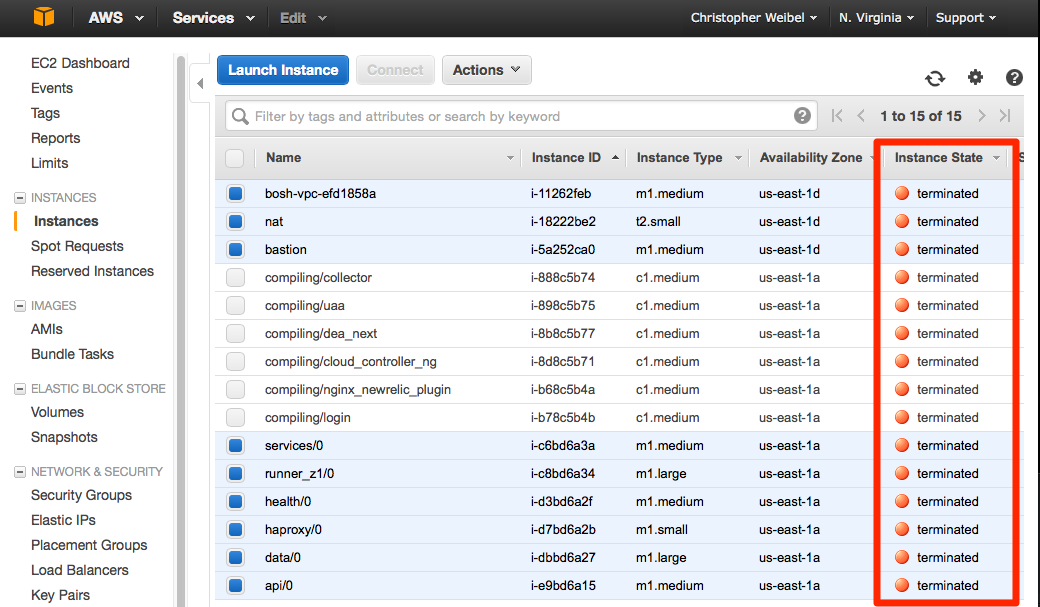
Again, on the Terminate Instances screen click “Yes, Terminate”
This will possibly take a few minutes but when done the Instance State for all servers should be “terminated”
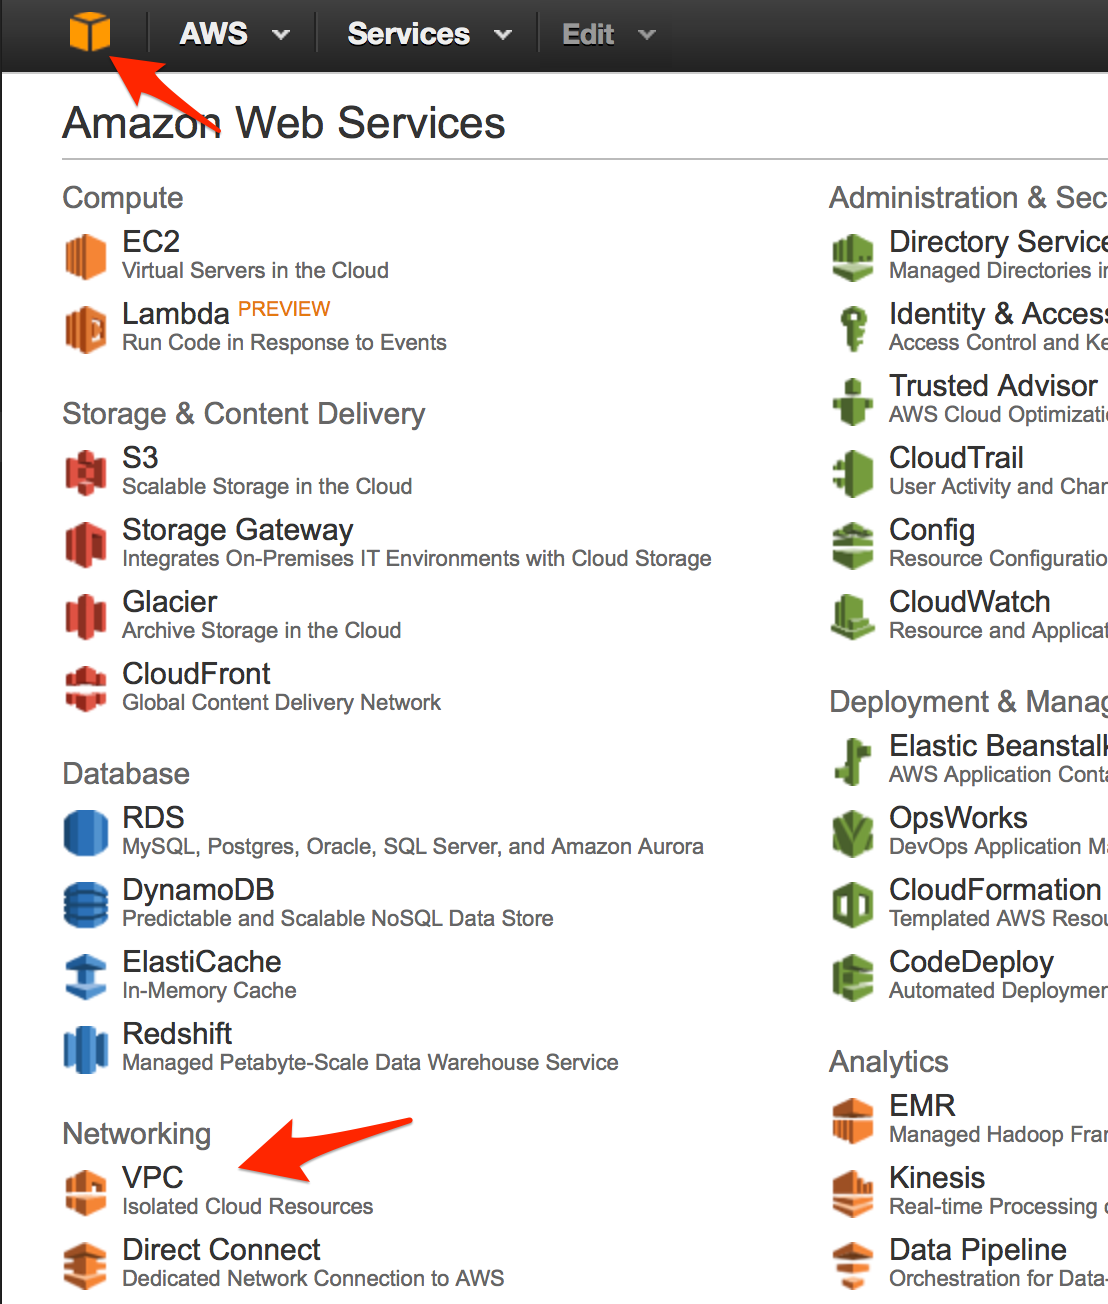
VPC
VPCs are located in a different part of the AWS Console.
Navigate to “Your VPCs”, select the row named “cf-vpc”, right click and select “Delete VPC”
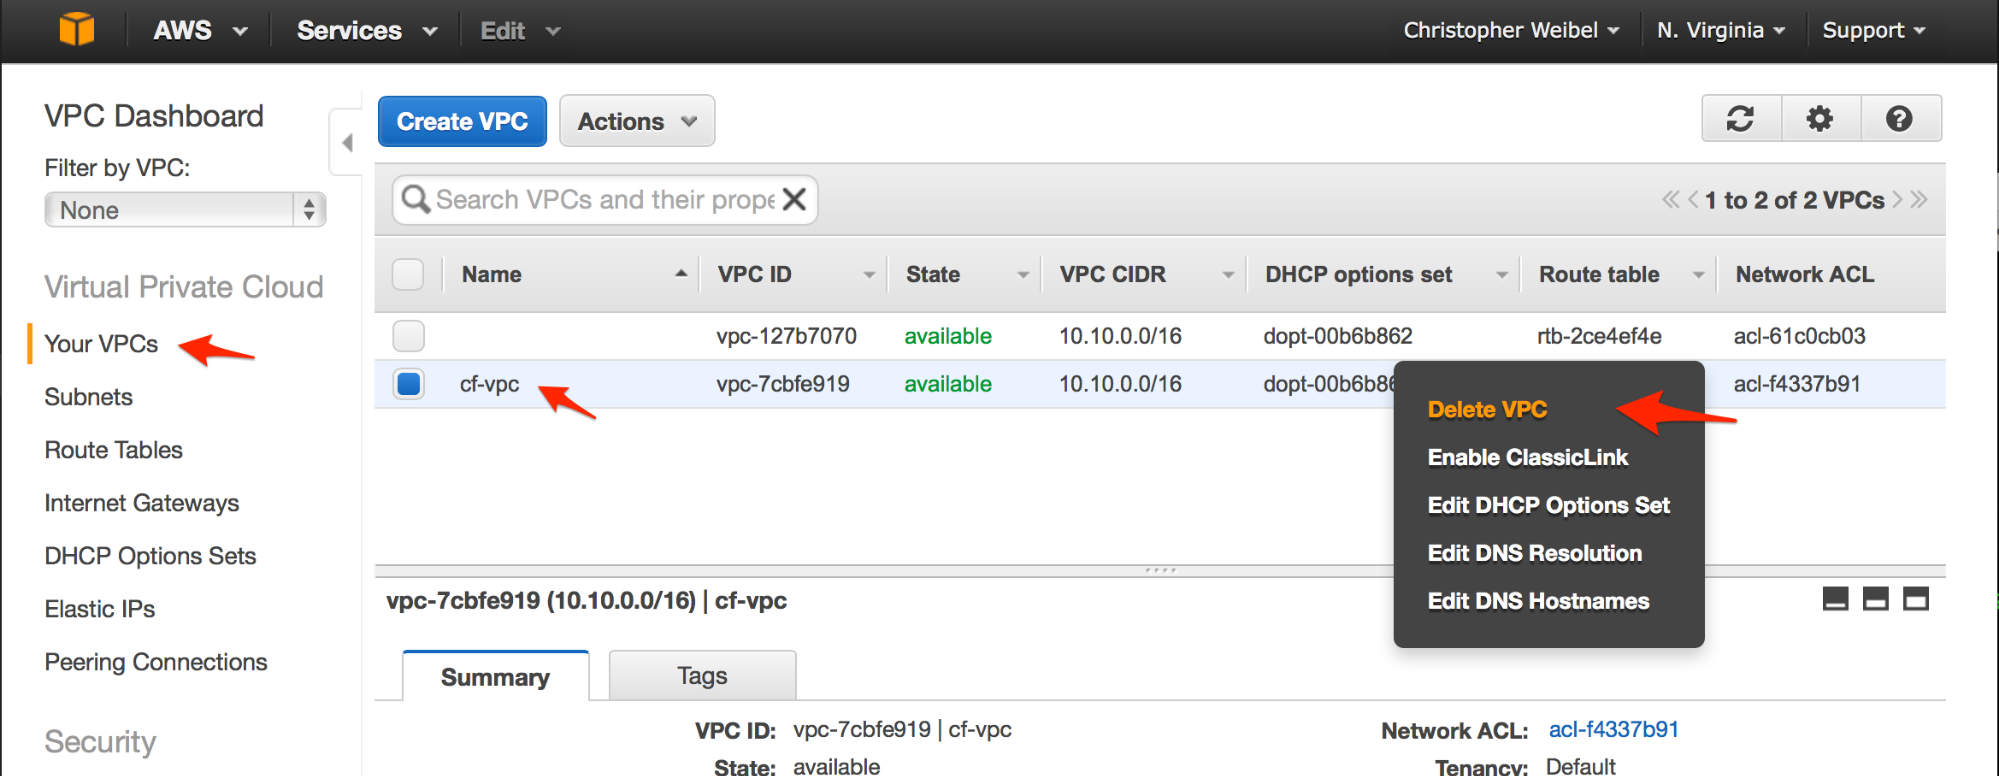
On the Delete VPC screen, click “Yes, Delete”

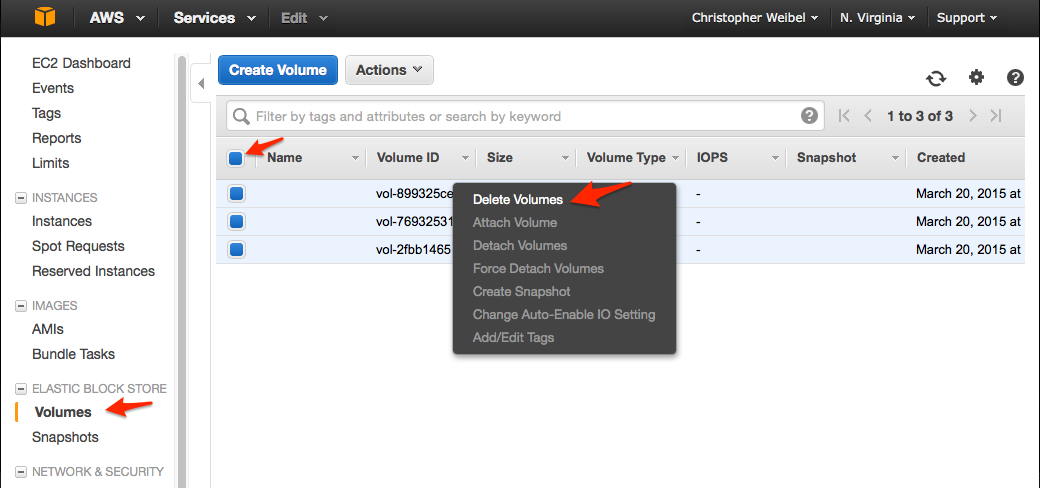
Volumes
Now that the servers have been terminated, on the left pane to “Elastic Block Store” > “Volumes”. Select all of the volumes by checking the box to the left of the volume Name, right click and select “Delete Volumes”.
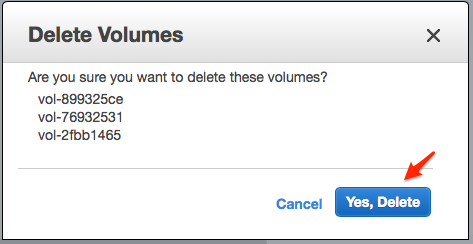
On the Delete Volumes screen click “Yes, Delete”
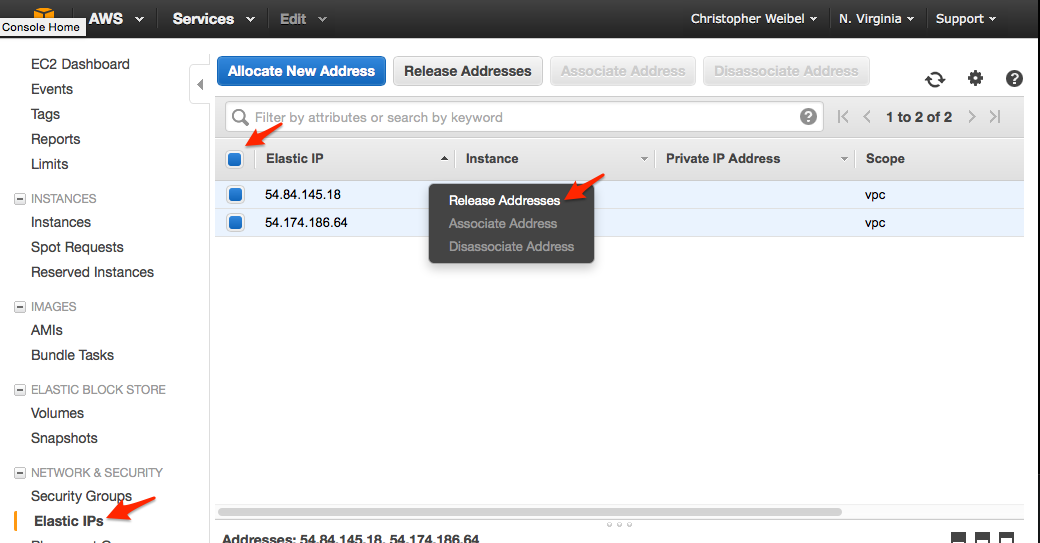
Elastic IPs
Navigate on the left pane to “Network & Security” > “Elastic IPs”. Click all of the boxes to the left of the Elastic IPs, right click and select “Release Addresses”
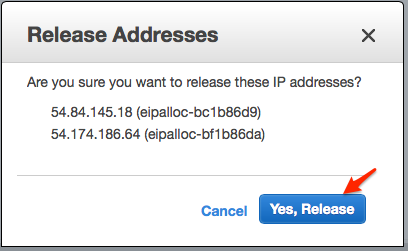
On the “Release Addresses” screen click “Yes, Release”
That’s it!
If you would like to deploy Cloud Foundry using this account, repeat Exercise #2 and when done, Exercise #4.
We are working on an OpenStack version of this as well, the documentation is missing but the project works, check it out at: https://github.com/cloudfoundry-community/terraform-openstack-cf-install
Resources
The primary repository is located here:
https://github.com/cloudfoundry-community/terraform-aws-cf-install
Terraform AWS VPC
https://github.com/cloudfoundry-community/terraform-aws-vpc
Terraform AWS CF Net
https://github.com/cloudfoundry-community/terraform-aws-cf-net
Installing RVM
https://rvm.io/rvm/install
Installing Git
http://git-scm.com/book/en/v2/Getting-Started-Installing-Git
CF CLI Releases
https://github.com/cloudfoundry/cli/releases
Traveling CF CLI Install
https://github.com/cloudfoundry-community/traveling-cf-admin
Bosh Bootstrap
https://github.com/cloudfoundry-community/bosh-bootstrap

Spread the word