Assumptions:
- OpenStack is already installed
- If OpenStack Juno is used, make sure this patch is applied
- You are provided an admin login or an administrator follows the steps in ‘Create A New User’ and provides you the credentials
- An external network has been created
- An Ubuntu image is already uploaded
We will:
- Create a new user name and password
- Create a new project
- Retrieve the tenant name
- Retrieve the tenant id
- Retrieve the network
- Retrieve the auth url
- Retrieve the floating IP pool
- Retrieve the external network id
- Identify a local set of keys to use
Step 1 – Create a new user name and password
Once you login into Horizon, select the admin project, navigate to Identity > Users and click + Create User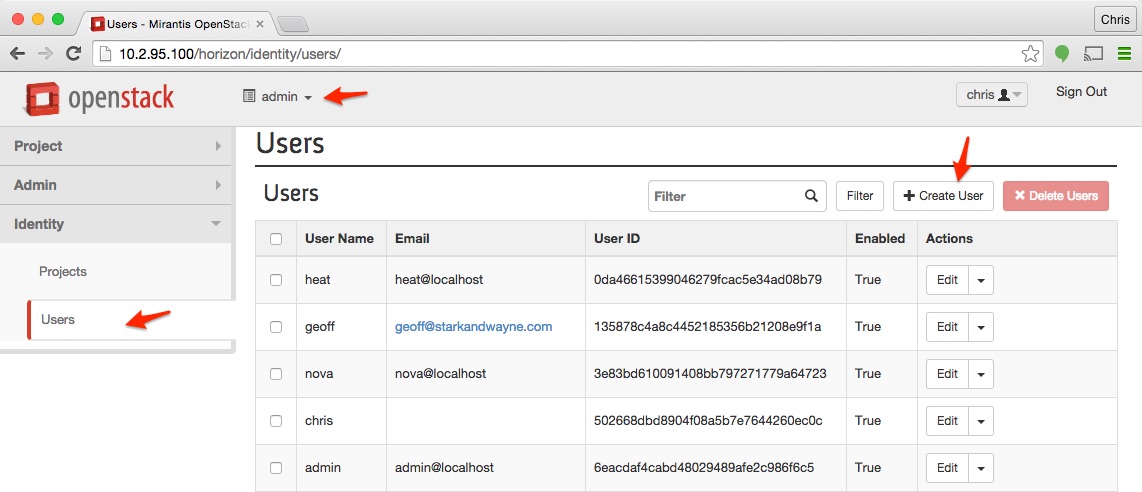
On the Create User screen, enter a username and password, set both the Primary Project and Role to admin and click Create User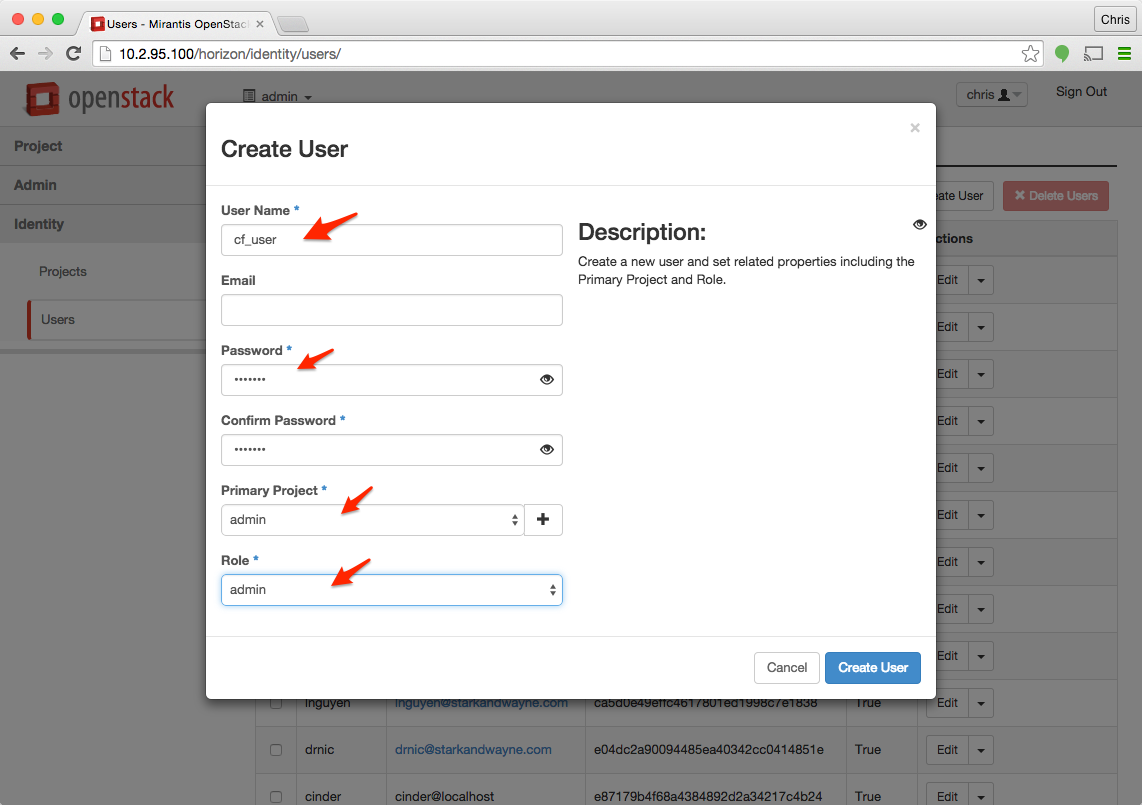
Step 2 – Create a new Project
Select the admin project, navigate it Identity > Projects and click + Create Project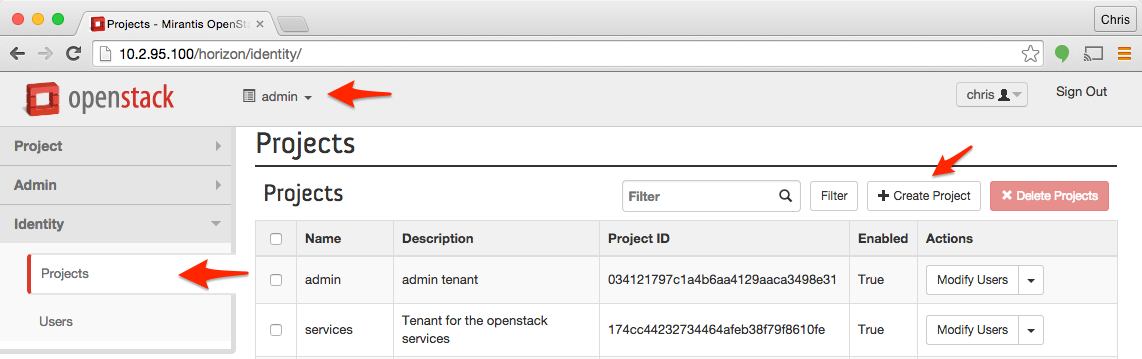
On the Project Information tab enter the name for the project. Make sure that the project name does not include white space, this restriction will eventually be fixed. Note that this is also the tenant name you will need later.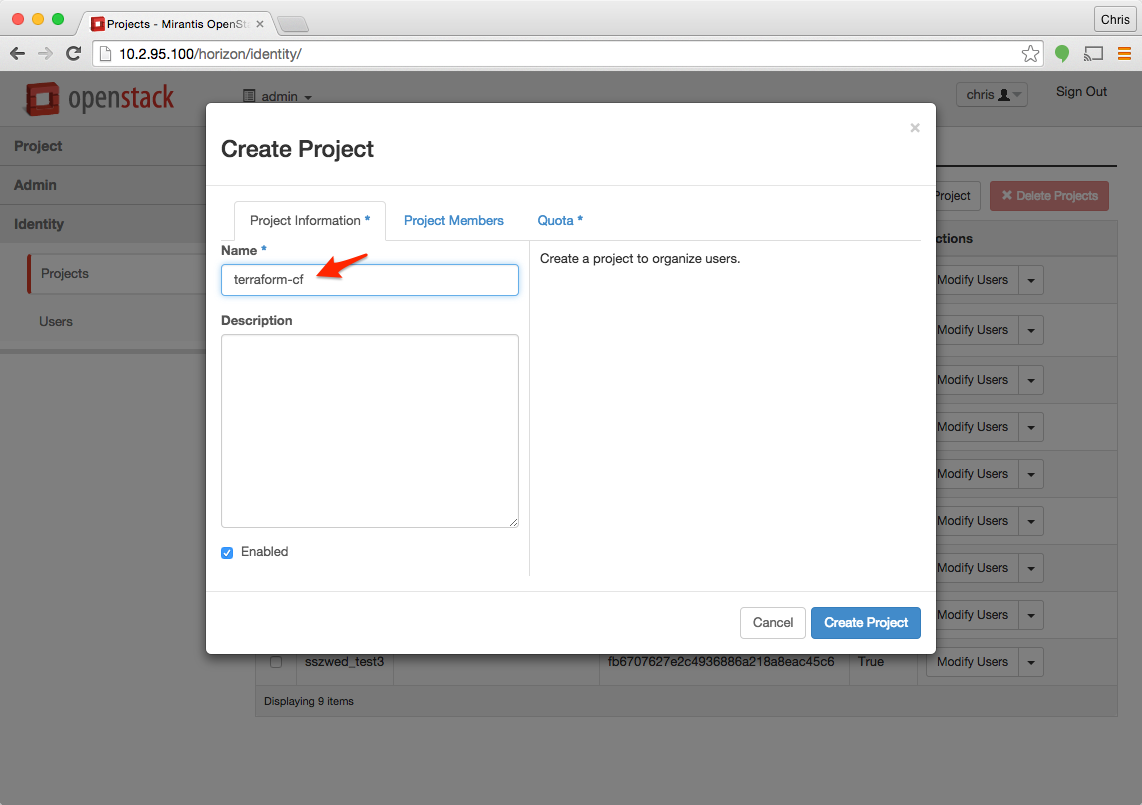
On the Project Members tab, select the user we created back in Step 1 by clicking on the blue “+” icon.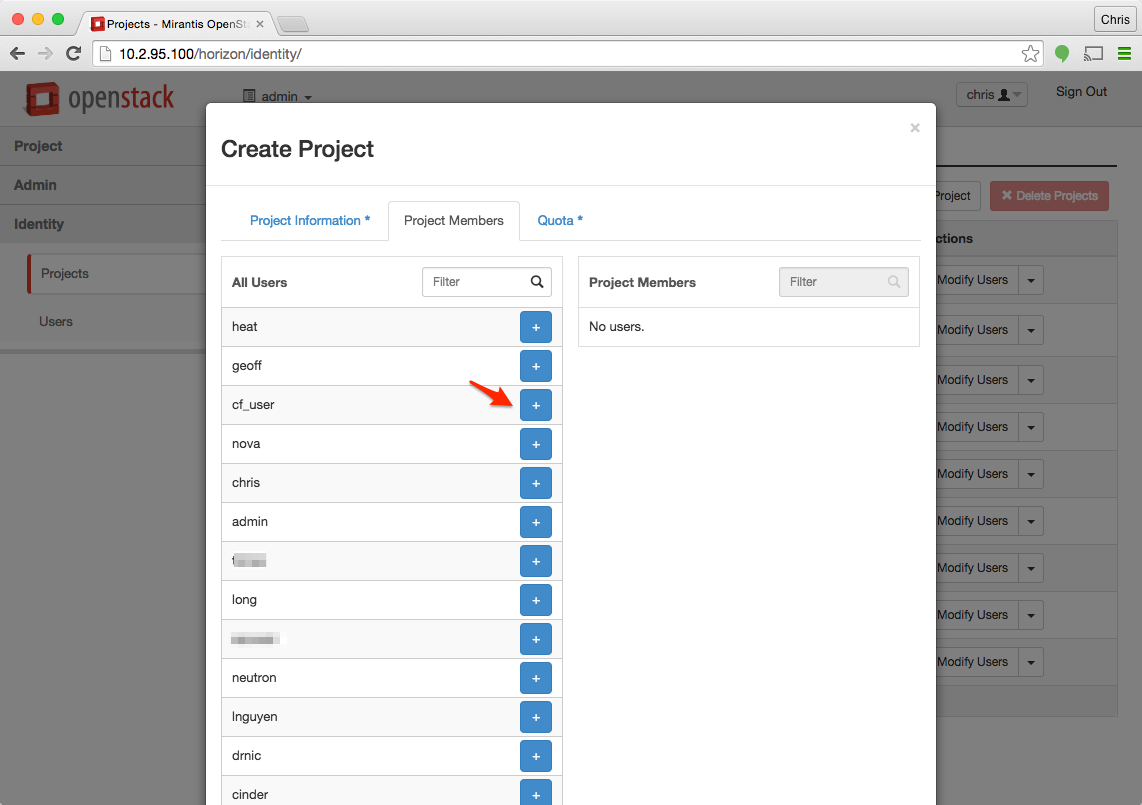
Once the user is selected, be sure that the permissions for the user are _member_, higher permissions are not required and cause errors. Click Create Project when you are done adding users.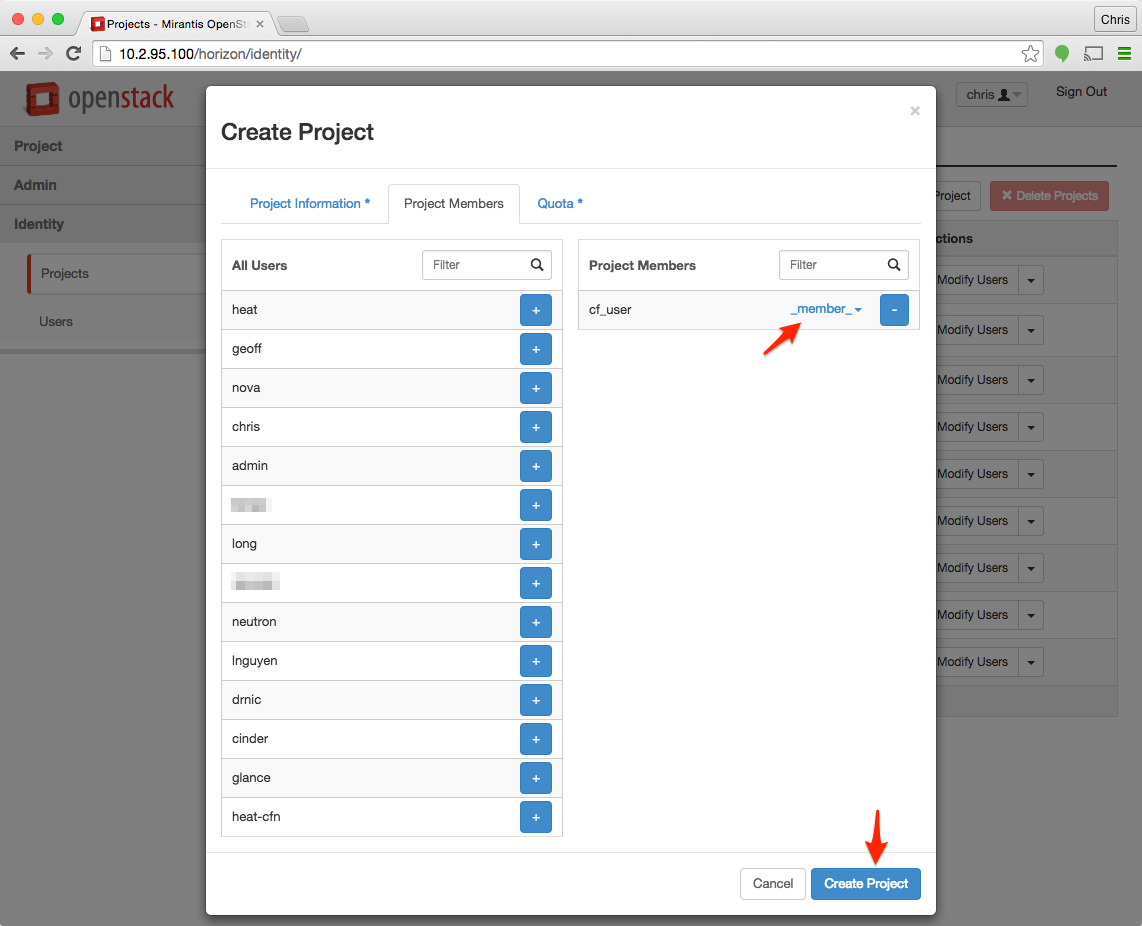
Step 3 – Retrieve the tenant id
Now logout and login as the user cf-user (or whatever user you created in Step 1).
Select cf-terraform as the project and navigate to Identity > Projects. Identify the row which corresponds to the project we created in Step 2. The tenant id is located in the Project ID column for the identified project.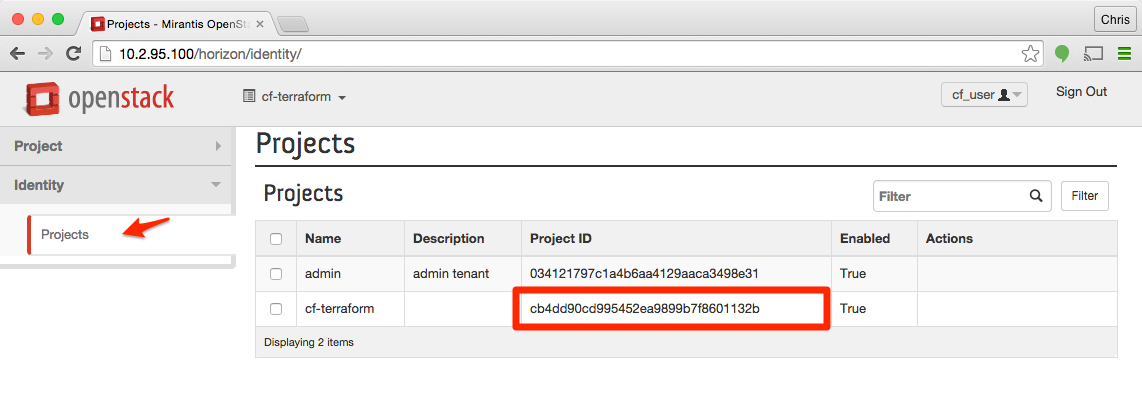
Step 4 – Retrieve the network
This one is fairly simple, we have decided that all internal ip addresses should be in the range 192.168.x.x so network will be “192.168”
Step 5 – Retrieve the auth_url
Logged in as cf-user and using the cf-terraform (the name we used in Step 2) project navigate to Project > Compute > Access & Security, and select the API Access tab. The auth_url is listed under the Identity Service Endpoint value.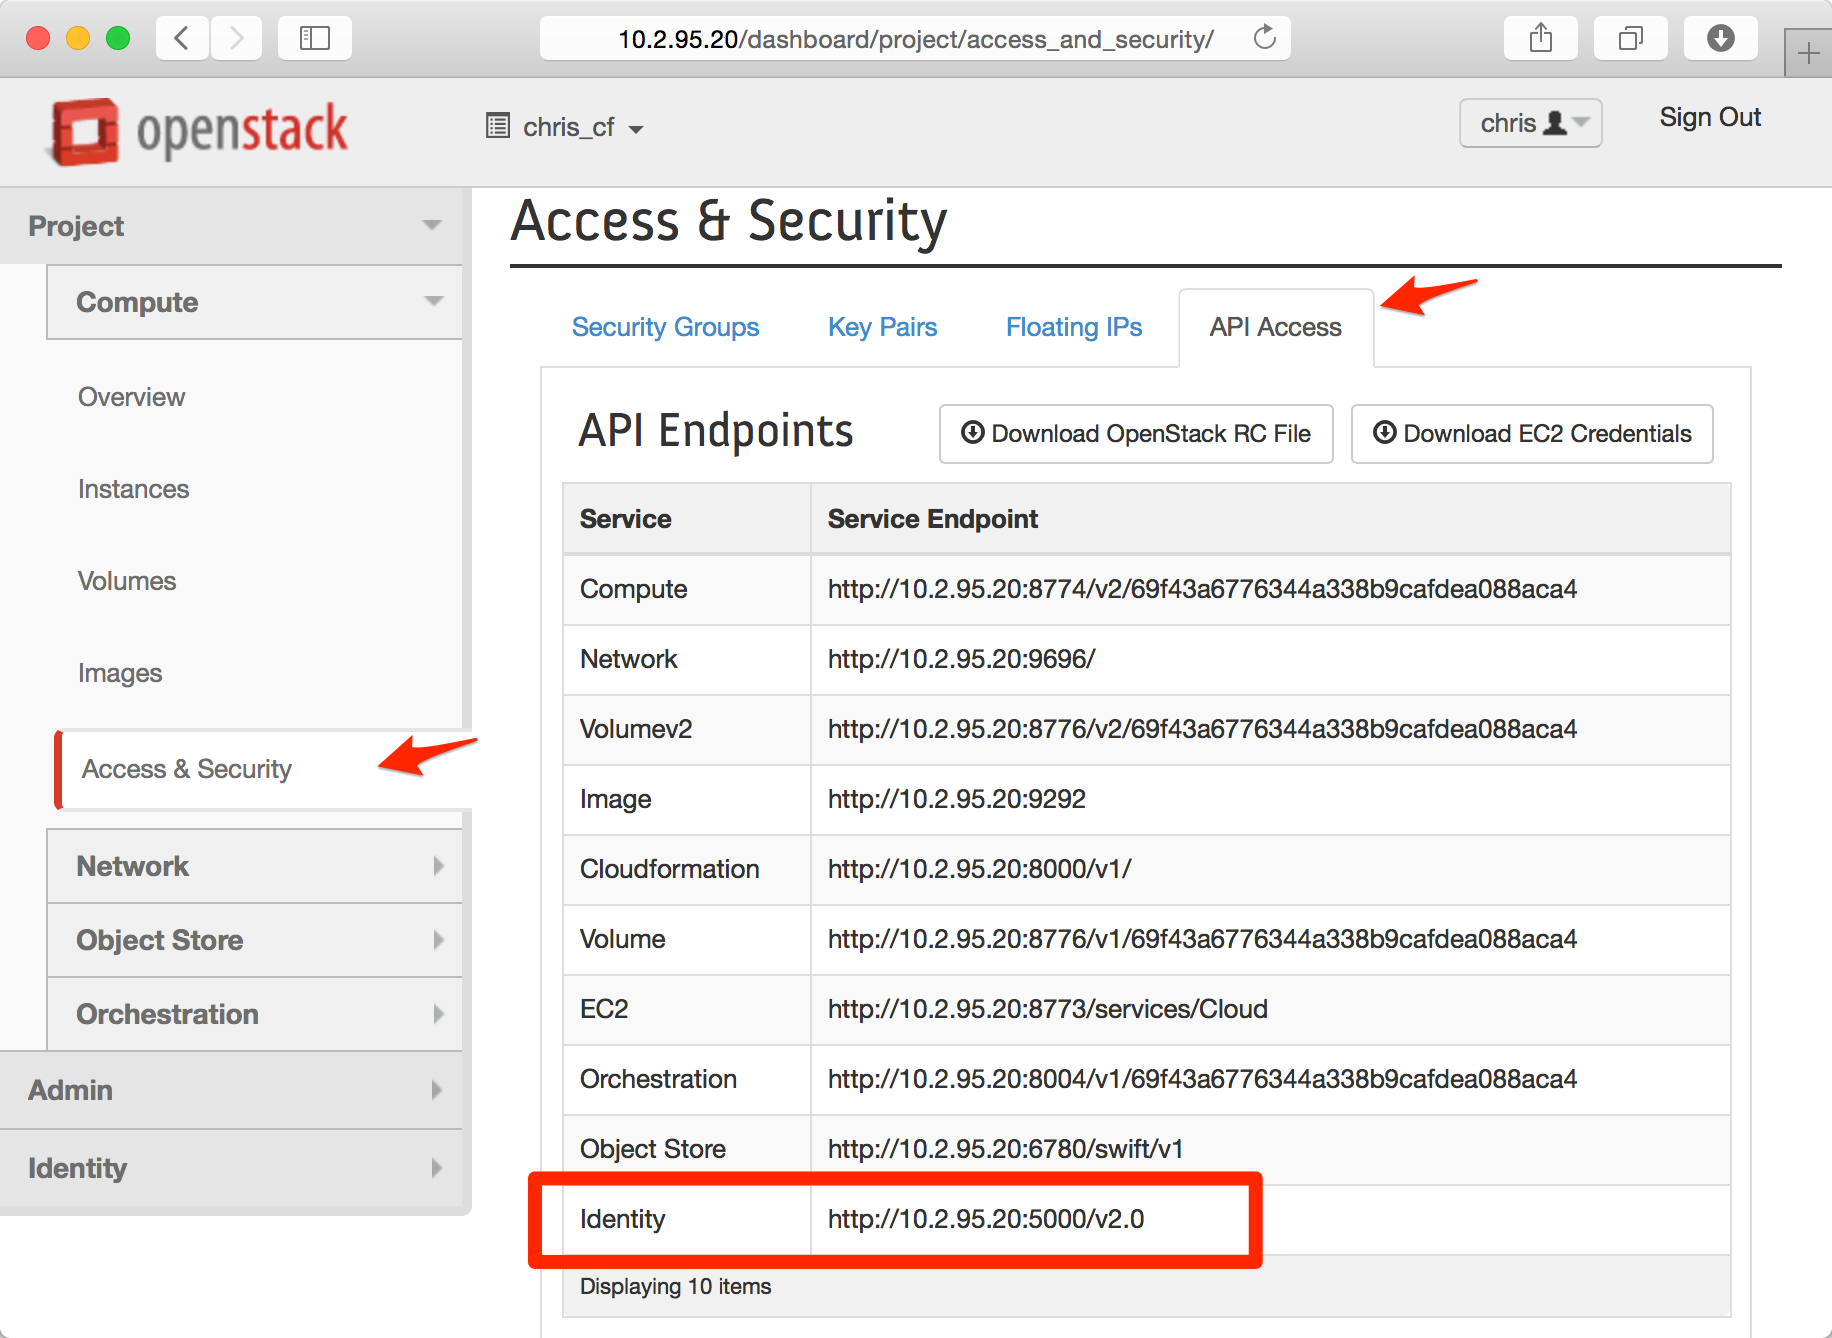
Step 6 – Retrieve the floating IP pool
Logged in as cf-user and using the admin project (note: NOT cf-terraform project) navigate to Project > Network > Networks. Your OpenStack administrator can identify the external network, the floating_ip_pool is listed under the Name column for the identified row.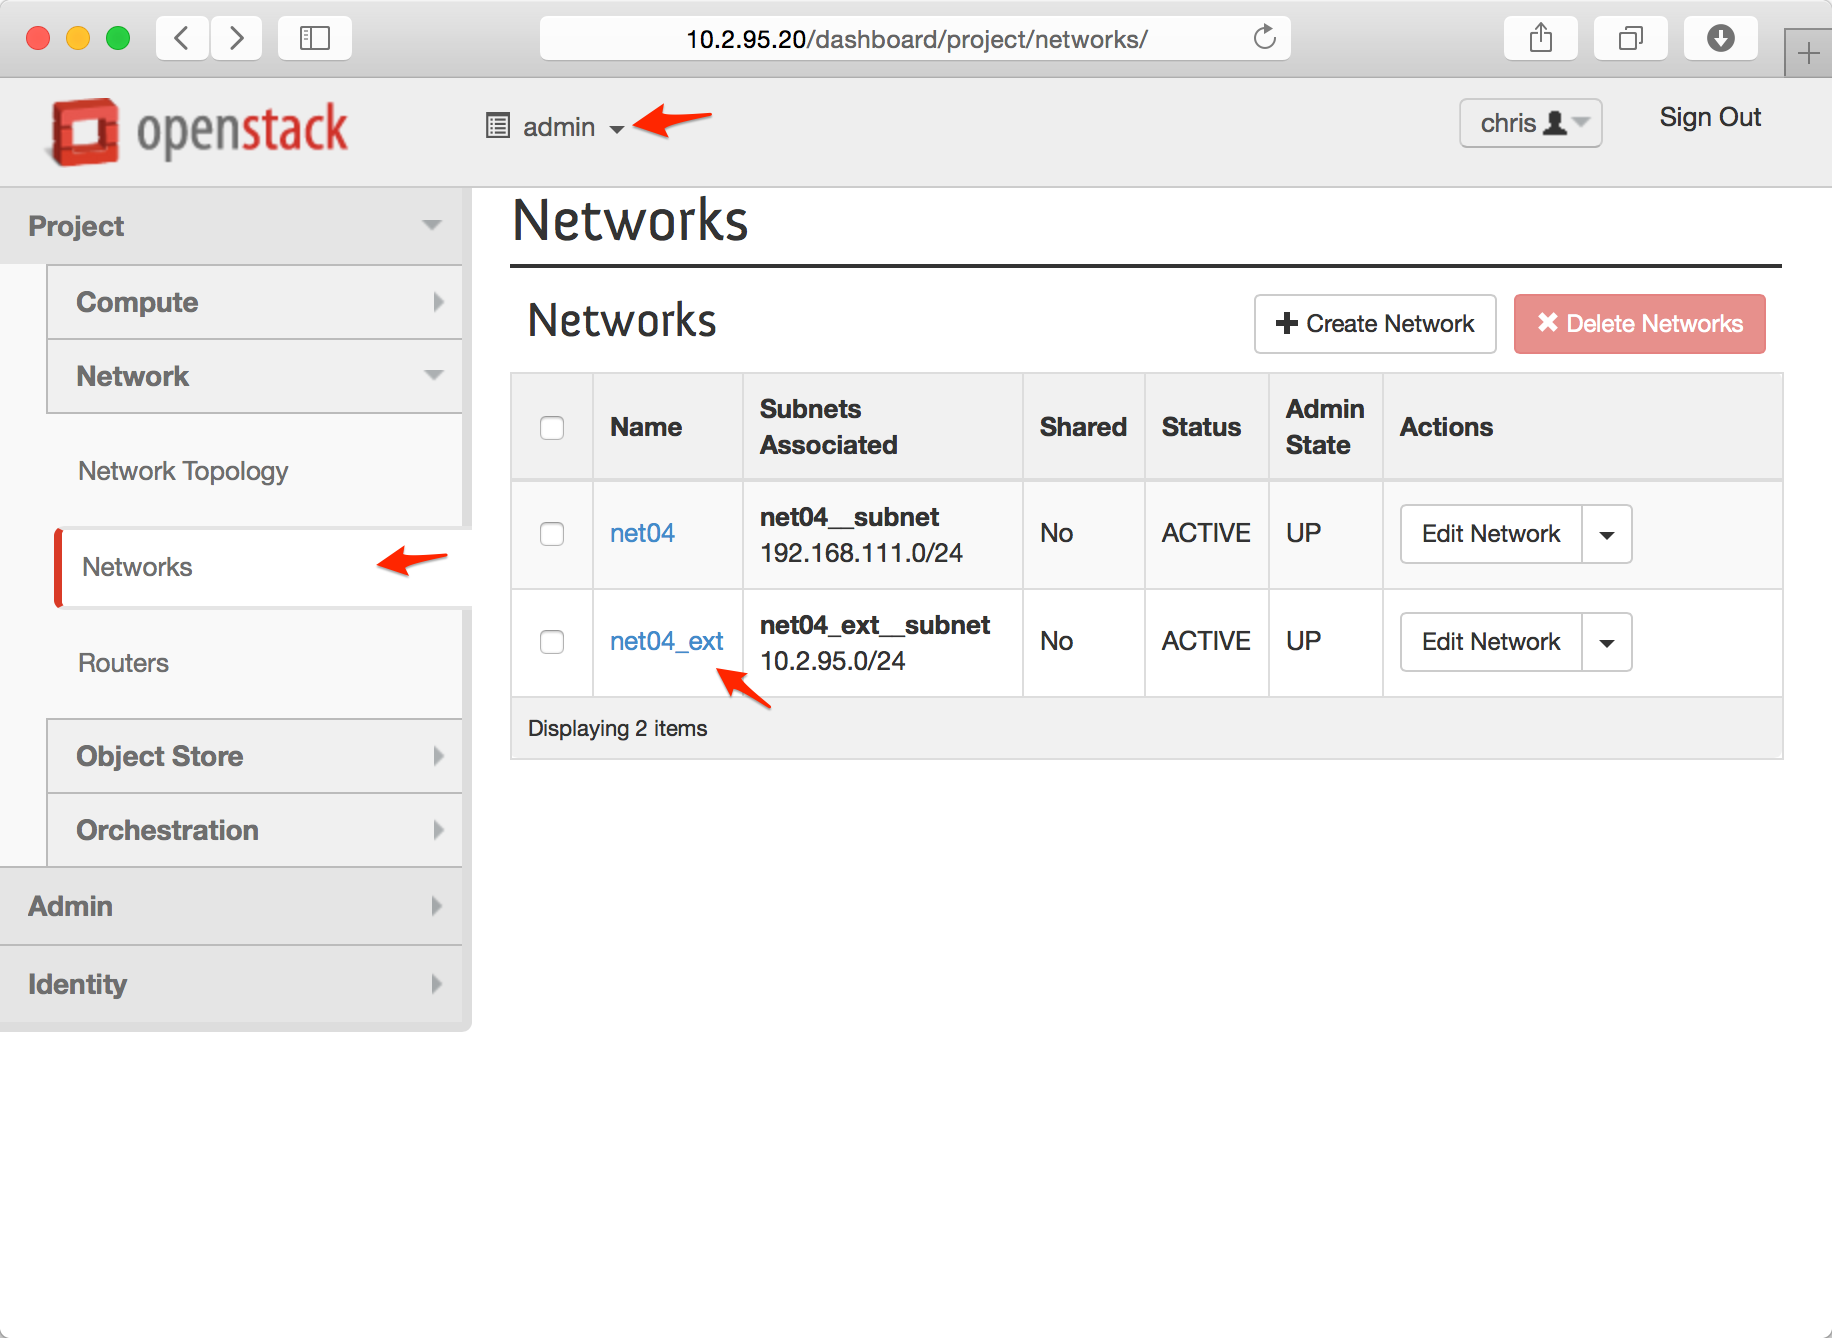
Step 7 – Retrieve the external network id
Logged in as cf-user and using the cf-terraform project navigate to Network > Networks, and select the floating ip pool from Step 6. The network_external_id is listed under the section “ID”.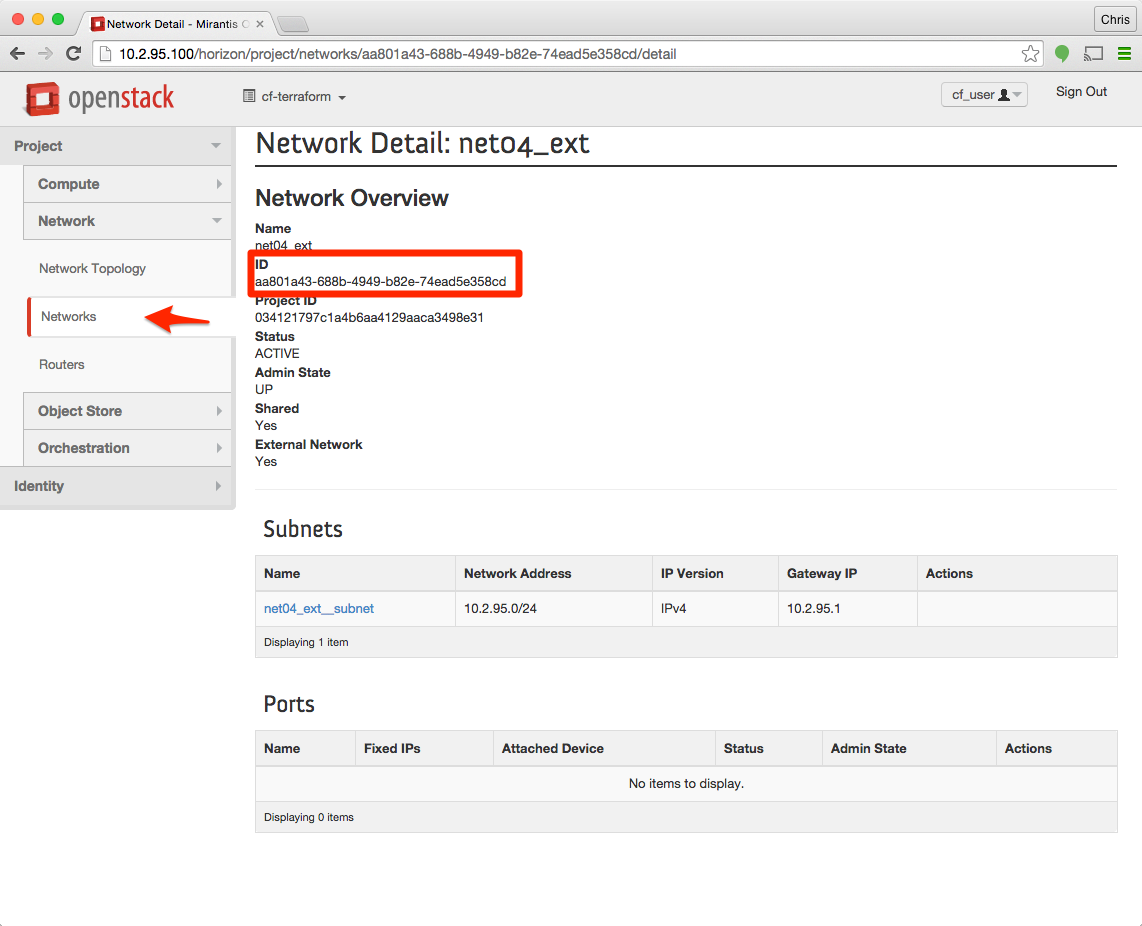
Step 8 – Identify a local set of keys to use
You need to use a set of public/private keys which do not have a passphrase. If you would like to create your own keys:
Key creation on Linux and OSX
Execute the following command:
ssh-keygen -t rsa -N "" -f ~/.ssh/cfkeyThis will create two files:
- Your public_key_path at
~/.ssh/cfkey.pub - Your key_path at
~/.ssh/cfkey
Key creation on Windows
Since Windows does not have this functionality prebuilt, please consult whatever tool you are using to SSH to server.
Summary
At the end we have the following information:
network = "192.168"                                        # Step 4
auth_url="http://10.2.95.20:5000/v2.0"                     # Step 5
tenant_name="terraform_cf"                                 # Step 2
tenant_id="cb4dd90cd995452ea989b7f8601132b"                # Step 3
username="cf_user"                                         # Step 2
password="cf_user"                                         # Step 2
public_key_path="/Users/chris/.ssh/cfkey.pub"              # Step 8
key_path="/Users/chris/.ssh/cfkey"                         # Step 8
floating_ip_pool="net04_ext"                               # Step 6
region="RegionOne"
network_external_id="aa801a43-688b-4949-b82e-74ead5e358cd" # Step 7
Spread the word